You can refinish the leather, plastic, vinyl, and fabric surfaces on your doors, seats, dash, console, carpet, and upholstery. Restore the appearance of your vehicles interior to the way it was when it was new. Repair defects or blemishes. Customize your vehicle interior with a unique look by changing colors or by two toning.
The products and procedures outlined below are designed to help you in your car interior upholstery repair and enhance your vehicle inexpensively yourself with great results.
Automobile interior restoration projects fall into the following categories:
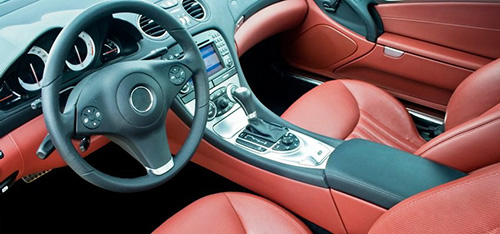
Click Below for Step-by-Step Instructions – Interior Restoration
Interior restoration projects fall into the following categories:
Refinishing Leather, Vinyl or Plastic with Interior Color
Step 2 – Prepare Surface by Scuff Sanding and Cleaning
- Clean the Plastic/Vinyl/Leather surface with SEM Soap and a Grey Scuff Pad. The scuff pad not only helps clean the surface of the Plastic/Vinyl/Leather part, but also provides adhesion by scuffing the surface, allowing Interior Color to adhere better.
- Scrub thoroughly, paying close attention to textured or recessed areas. You must get into every nook and cranny to make sure all the areas are clean.
- Rinse with water or wipe soap residue away with a clean damp Lint Free Towel and allow surface to dry.
For Leather surfaces:
.
- Once the surface is completely dry, scuff again with a Grey Scuff Pad to insure maximum adhesion of Interior Color to be applied.
- Rinse with water or wipe with a clean damp Lint Free Towel and allow surface to dry.
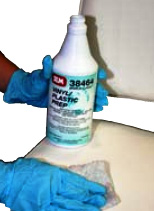
Step 3 – Remove Remaining Surface Contaminants
- Once the Plastic/Vinyl/Leather surface is completely dry, use Zero VOC Surface Cleaner and a clean Lint Free Towel wiping in one direction.
- Zero VOC Surface Cleaner will remove silicon, oil, grease and other contaminants that SEM Soap may not have removed. Color will not adhere properly to a surface with silicon, oil or grease.
- DO NOT let Zero VOC Surface Cleaner air dry on the surface (it will leave a residue behind). If Zero VOC Surface Cleaner air dries on the surface, re-wet and then dry with a clean Lint Free Towel.
- If contamination still exists, water will bead on the surface. Repeat the step above until water beading does not occur.
Helpful Tip: Wiping in one direction will remove contaminants from the surface, rather than smearing contaminants around. Remove contaminants from the surface before you begin applying Adhesion Promoter or Interior Color to eliminate the potential for “fish eyes” and poor adhesion.
Helpful Tip: Remember to mask off with Tape, Masking Paper or Plastic Sheeting any area or surface that you do not get overspray on. If possible, you may want to remove the interior part from the vehicle before you begin spraying

Step 4 – Use Adhesion Promoter for Plastic Surfaces Only
- You will not need an adhesion promoter for vinyl or leather. However, for plastic surfaces you will need to use an Adhesion Promoter prior to applying Interior Color.
- Use a Tack Rag to lightly remove any dust or debris from the surface of the plastic and then apply one light coat of Adhesion Promoter.
- Allow 5 minutes dry time and then apply a second full coat of Adhesion Promoter.
- Wait 15 minutes but no longer than 30 minutes before applying Interior Color.
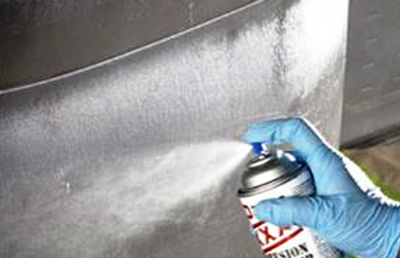
Step 5 – Apply Interior Color
- You can apply Interior Color directly to Leather and Vinyl surfaces after they have been cleaned with Zero VOC Surface Cleaner.
- You can apply Interior Color to Plastic surfaces after you have applied Adhesion Promoter (wait 15 minutes for Adhesion Promoter to dry, but not more than 30 minutes before applying Interior Color to Plastic surfaces.
- Apply several light coats of Interior Color allowing 5 to 10 minutes flash time between coats.
- Let the final coat of Interior Color dry for 24 hours before using.
Spot Repair:
.
If you are doing small touch up and are not refinishing the entire interior part, paint the area that is damaged until you achieve full coverage. To blend the paint edge, wait until Interior Color has flashed off for approximately 5 to 10 minutes and then lightly mist spray the edge with Interior Color Reducer in a clean Spray Gun, Preval Sprayer, V-Fan Air Brush or Spra-Tool.
Helpful Tip: There are several different ways to apply Interior Color (pictured right).
- If you do not have an air compressor, for larger areas you can brush on with a Poly Brush or spray on with an Aerosol Can, Preval Sprayer, or Spra-Tool Sprayer. For smaller areas you can use a vFan Air Brush.
- If you have an air compressor, you can apply by Spray Gun.
- Interior Color is available in ½ Pint, Pint, Quart, and 12 Ounce Aerosol quantities.
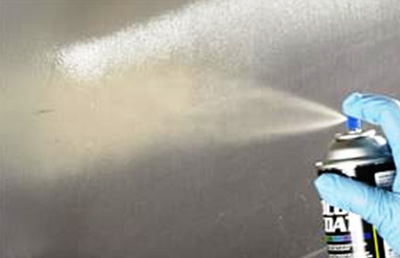
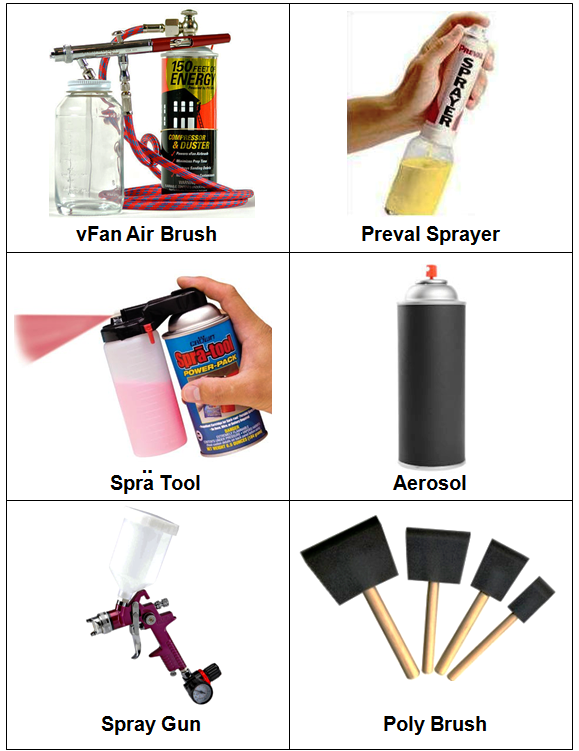
Application Options
Refinishing Interior Carpet
Refinishing interior carpet is a great way to maintain the new car look for your vehicle. Carpets usually receive the most wear and tear, and refinishing them is fairly simple as long as you follow all the suggested steps.
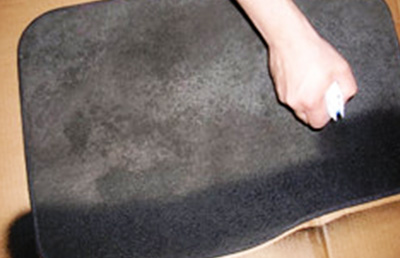
Step 2 – Prepare Surface by Scrubbing and Cleaning
- Clean carpet with a good quality Carpet Shampoo to remove dirt and contaminants before refinishing.
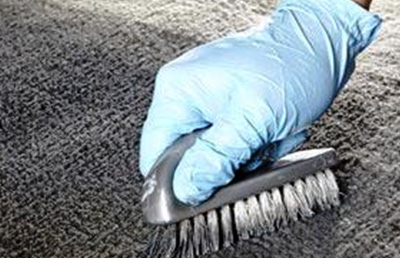
- Thoroughly scrub the carpet with Carpet Shampoo and a nylon bristle Carpet & Floor Mat Brush to loosen all dirt.
- Rinse with clean water, and allow carpet to dry completely.
- Vacuum to remove any remaining loose dirt or debris.
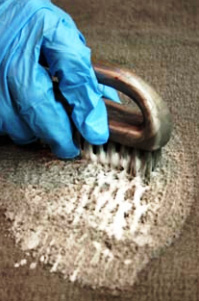
Step 3 – Remove Remaining Surface Contaminants
- Use Plastic & Leather Prep on carpet to remove any remaining contaminants that may react with Carpet Color.
- Scrub the carpet lightly separating the carpet fibers with a nylon bristle Carpet & Floor Mat Brush using the Plastic & Leather Prep to remove oil, grease and contaminants.
- Allow surface to dry.
- Vacuum any remaining dirt or debris left after carpet dries completely.

Step 4 – Apply Carpet Color
- Start with the application of one light coat of Carpet Color.
- Maintain a distance of approximately 6 to 8 inches from the surface of the carpet.
- You should spray in a well ventilated area at a temperature above 60 degrees.
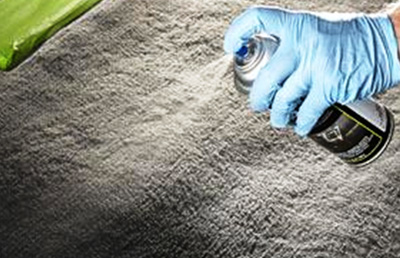
Step 5 – Brush in Color and Separate Carpet Fibers
- Immediately after applying the first coat of Carpet Color, use a nylon bristle Carpet & Floor Mat Brush to brush the Carpet Color into the carpet in all directions keeping the carpet fibers separated.
- Allow a 5 minute dry time and then apply a second full coat of Carpet Color.
- Brush surface again in all directions to make certain the carpet fibers are separated.
- If needed, apply a 3rd coat of Carpet Color, repeating the brushing immediately afterwards.
- Allow the last coat of Carpet Color to dry overnight (24 hours) before using.
Helpful Tip: Use Carpet Color sparingly on carpet and velour so as not to change the texture or feel of the surface being sprayed. Carpet Color is recommended only to enhance the color of carpet and velour, not to drastically change its color.
Please check local VOC regulations to ensure compliance and use of all products in your area.
To keep your interior clean and protected, see the Polishing & Detail project section.
Repairing Tears or Holes in Interior Leather or Vinyl with SEM Products
It happens. Tears, rips, and punctures. It can be expensive to fix. The procedures and products outlined below are provide you options to fix these tears, rips, and punctures yourself very easily and inexpensively.
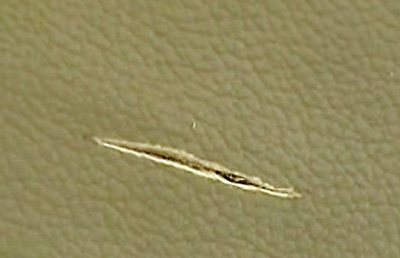
Step 1 – Scuff Sand and Clean Surface
Clean the Leather or Vinyl surface with SEM Soap and a Grey Scuff Pad. The scuff pad not only helps clean the surface of the Leather or Vinyl, but also provides adhesion by scuffing the surface, allowing the Leather and Vinyl Repair Compound and Interior Color to adhere better.
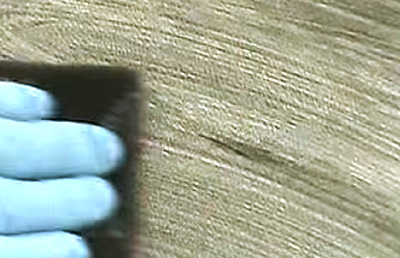
Step 2 – Wipe Surface Clean
- Rinse with clean water and / or wipe soap residue away from the Leather or Vinyl surface with a clean damp Lint Free Towel and allow surface to dry.
- Once the Leather or Vinyl surface is completely dry, use Zero VOC Surface Cleaner and a clean Lint Free Towel wiping in one direction.
- Zero VOC Surface Cleaner will remove silicon, oil, grease and other contaminants that SEM Soap may not have removed.
If Zero VOC Surface Cleaner air dries on the Leather or Vinyl surface, re-wet and then dry with a clean Lint Free Towel.
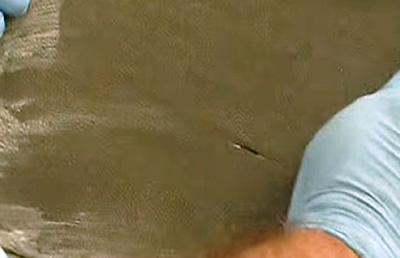
Step 3 – Clean and Sand edges of Tear or Hole
- If needed, trim away any cracked edges from the tears, rips, or punctures with a Razor Blade.
- Sand around the repair area by hand with 400 Grit Production Sandpaper or 600 Grit Production Sandpaper.
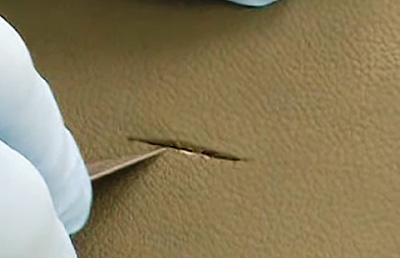
Step 4 – Trim Backing Fabric to fit Tear or Hole
- Trim a piece of Backing Fabric to fit behind the tear or hole.
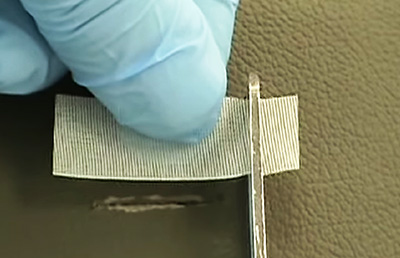
Step 5 – Mark Center and Place in Tear or Hole
- Mark center of the trimmed piece of Backing Fabric with an “X” so you can see the center (X) as it lies behind the tear or hole.
Place Backing Fabric behind the tear or hole with Tweezers.

Step 6 – Apply Leather & Vinyl Repair Compound
- Apply a thin layer of Leather and Vinyl Repair Compound to the Backing Fabric and the Leather or Vinyl.
- The Leather and Vinyl Repair Compound will help the Backing Fabric adhere to the Leather or Vinyl.
- Remove excess Leather and Vinyl Repair Compound immediately with a clean Lint Free Towel from the front surface of the Leather or Vinyl.
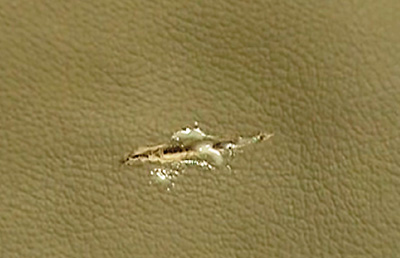
Step 7 – Lightly Apply Heat
- Use a Heat Gun to lightly apply heat to the Leather and Vinyl Repair Compound.
- You can cut out an area the size of the repair from cardboard to concentrate the heat only on the repair area (as is pictured right).
Do not apply excessive heat to the surface of the Leather or Vinyl! Doing so may soften and damage the Leather or Vinyl substrate.

Step 8 – Repeat Filling & Drying Procedure
- Apply several thin layers of Leather and Vinyl Repair Compound using a small Body Filler Spreader to the front surface of the Leather or Vinyl.
- Use the Body Filler Spreader to flatten and even-out the Leather and Vinyl Repair Compound.
- Gently dry each application of the Leather and Vinyl Repair Compound with a Heat Gun.
- Repeat this process until you have filled in the tear or hole completely.
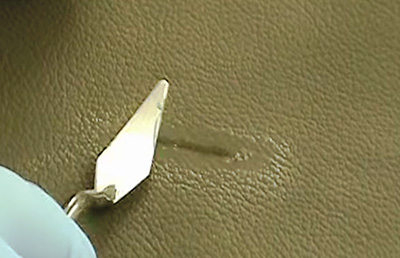
Step 9 – Select a Matching Interior Graining Pad
- Interior Graining Pads are used to duplicate interior grains when using Leather & Vinyl repair compound.
- Select an Interior Graining Pad that matches the grain of the Leather or Vinyl surface.
- The Sem 70022 Interior Graining Pad package contains 6 of the most popular leather and vinyl grains.
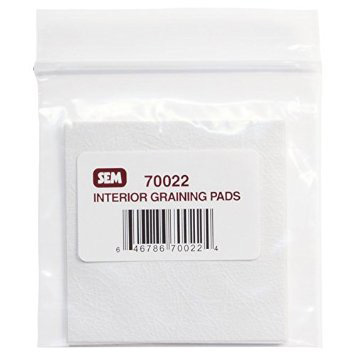
Step 10 – Heat and Apply Graining Pad
- After heating the last application of Leather and Vinyl Repair Compound, immediately apply the Interior Graining Pad onto the top of the Leather and Vinyl Repair Compound.

Step 11 – Apply Pressure to Graining Pad
- Apply pressure to the Interior Graining Pad with a Heel Dolly or equivalent heavy flat piece of metal.
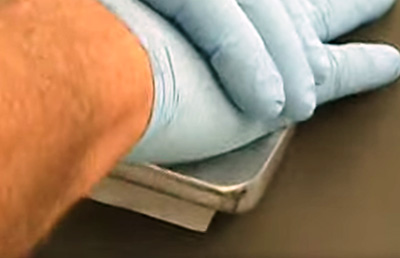
Step 12 – Lightly Sand, Clean and Top Coat
- Lightly sand down any high areas with 600 Grit Production Sandpaper or finer sandpaper.
- Clean surface with Zero VOC Surface Cleaner to remove contamination before top coating with Interior Color.
- Apply Interior Color over the entire prepared surface.
- If spot blending, apply Interior Color over the repair area only, then wait 5 to 10 minutes and lightly mist spray the edge with Interior Color Reducer in a clean Spray Gun, Preval Sprayer, vFan Air Brush or Spra-Tool.
Helpful Tip: To keep your interior clean and protected, see the Polishing & Detail project section.

Repairing Tears or Holes in Interior Leather or Vinyl with 3M Products
The 3M Leather and Vinyl Repair Kit (3M 08579) patches and repairs upholstery damages such as tears, burns, and cuts in vinyl and leather. A variety of colors and grain papers designed to match surrounding materials makes repairs blend in with existing vinyl or leather. A color matching guide helps determine the correct color to match the damaged surface.
The kit can be used on car seats and upholstery, dashboards, motorcycle seats, vinyl tops, marine and RV upholstery, golf bags, handbags, briefcases, luggage, furniture and other leather and vinyl goods.
The 3M Leather and Vinyl Repair Kit (3M 08579) includes:
- 7 Heat Cure Repair Compounds – 7 Colors (1/8 fl oz or 3.7 ml each)
- 2 Vinyl Adhesives (1/8 fl oz or 3.7 ml each)
- 3 Grain Paper Packets (3 x 3 inch or 7.62 x 7.62 cm)
- 1 Backing Fabric (3 x 3 inch or 7.62 x 7.62 cm)
- 1 Practice Vinyl (3 x 3 inch or 7.62 x 7.62 cm)
- 1 Spatula
- 1 Mixing Cup
- 1 Heat Transfer Tool
- 1 Color Match Guide
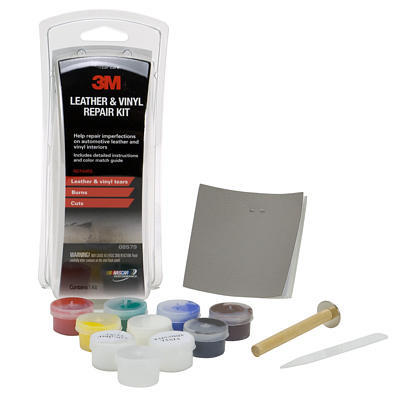
Step 1 – Clean Surface
Clean the Leather or Vinyl surface with 3M Aerosol Adhesive Remover and a clean cloth. This will remove oil and contaminants from the leather or vinyl surface.

3M 38987
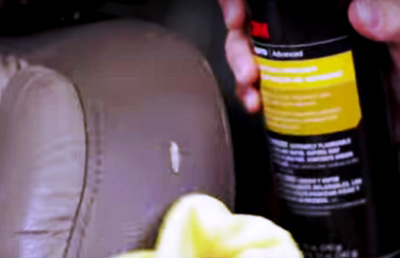
Step 2 – Cut Back Fabric
- For tears, burns or holes larger than a 1 /4 Inch (0.25 inch), use Backing Fabric (included in Kit) to provide support for the Heat Cure Repair Compound.
- For tears, burns or holes smaller than 1 /4 Inch (0.25 inch) you do not require Backing Fabric.
- Cut the enclosed Backing Fabric slightly larger than the damage.
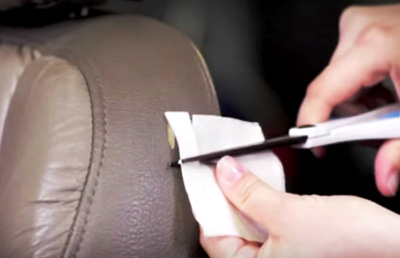
Step 3 – Fit Backing Fabric inside the Damaged Area
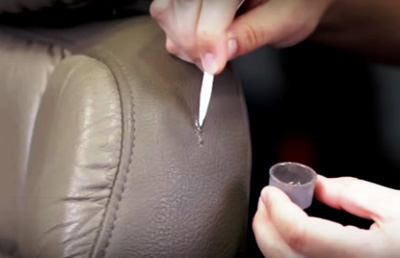
- Use the Spatula (included in Kit) to insert the Backing Fabric into and behind the tear, burn or hole.
- This will provide support for the Heat Cure Repair Compound.
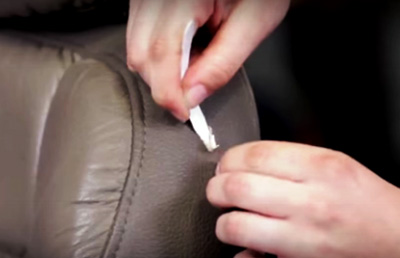
Step 4 – Apply Vinyl Adhesive to Backing Fabric
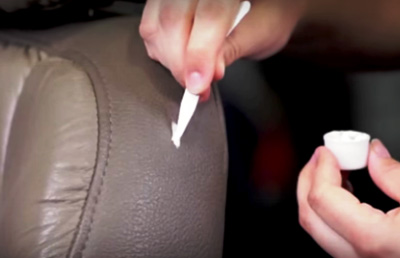
- You must use Vinyl Adhesive (included in Kit) to glue the Backing Fabric in place.
- Use the Spatula to coat the Backing Fabric with Vinyl Adhesive and position in place.
- For rips and tears, apply the Vinyl Adhesive under both edges and the center to hold backing fabric in place.
- For rips, tears, burns or holes smaller than 1 /4 Inch (0.25 inch) simply fill the area with Vinyl Adhesive until it is level with the surrounding surface.
- The Vinyl Adhesive will shrink as it dries. This void will later be filled with Heat Cure Repair Compound.
- Important: Allow the Vinyl Adhesive to dry a minimum of 4 hours @ 70° F (longer if temperatures are cooler.
Step 5 – Select Best Matching Grain Paper
- Leather and Vinyl surfaces usually have a texture or grain to their surface.
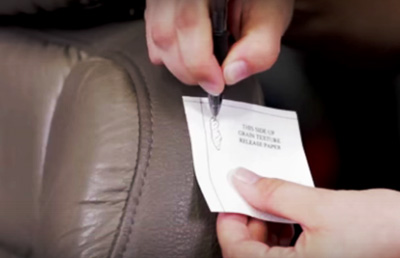
- Select the Grain Paper that best matches the texture or grain on the surface you are repairing (3 Grain Paper patterns are included in Kit).
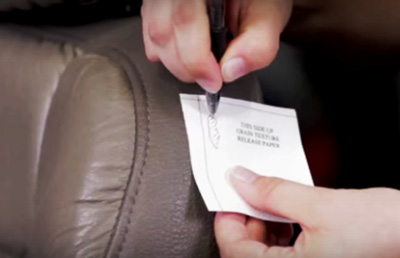
- On the top center of the Grain Paper you selected that best matches the texture or grain on the surface you are repairing, draw an outline of the damaged area.
- This will allow you to position the heat transfer tool accurately over the Heat Cure Repair Compound that you will be applying.
Step 6 – Match Color
- The Heat Cure Repair Compound comes in seven (7) different colors – Yellow, Blue, Black, Red, Green, Brown and White (see below).
- Using the Color Match Guide (see example on right) and the Empty Mixing Cup (both are included in the Kit) to mix a small amount of Heat Cure Repair Compound to obtain the desired color needed.
Helpful Tip: White will lighten colors; yellow will brighten colors; black and brown will darken colors; brown can be made using red as the base and adding black and yellow. Use the practice vinyl and your color match compound in order to compare it to your color vinyl or leather.
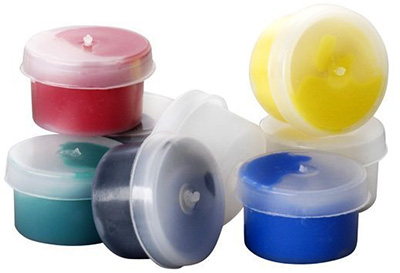
Heat Cure Repair Compound Colors
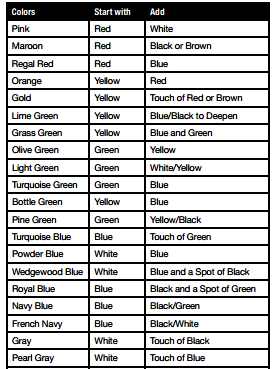
Color Match Guide (partial list)
Step 7 – Apply Color Matched Compound
- Apply the color matched Heat Cure Repair Compound to the repaired area.
- Apply smoothly and evenly, wiping up any excess.
Step 8 – Attach Graining Pad
- Place the Grain Paper previously selected over the still wet (un-dried) Heat Cure Repair Compound, making sure your drawn outline is directly over the damaged area.
- Do not move it.
- If repair is on a vertical surface, Tape the Grain Paper
Step 9 – Heat Transfer Tool on Hot Iron
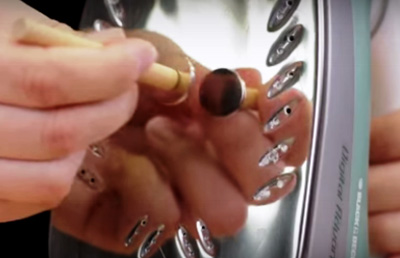
- Plug in a iron and allow to heat up on high setting (to approximately 300F) for at least four minutes.
- Place the metal tip of the Heat Transfer Tool (included in Kit) directly on the iron and allow several minutes to heat the tool.
Step 10 – Apply Color Matched Compound
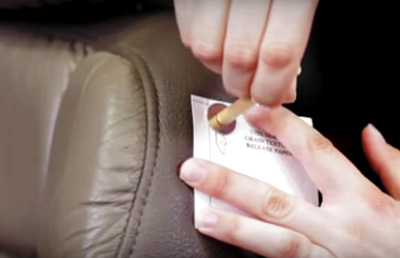
- After the t Heat Transfer Tool is heated, place the hot metal tip immediately on the Grain Paper over the drawn outline of the damage.
- Rotate the heat tool on the Grain Paper outline in a circular motion for 35-45 seconds.
- Reheat the Heat Transfer Tool and repeat this process until the color compound has cured and separates cleanly from the Grain Paper
Step 11 – Remove Graining Pad
- Remove the Heat Transfer Tool and Grain Paper from the repair area.
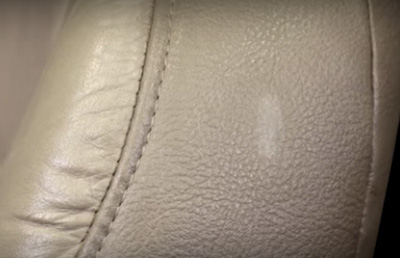
- You should now have a success patch over the rip, tear, burn or hole that closely matches your existing finish (exact color match will depend on how closely you mixed the colors to match existing color).
Helpful Tip: To keep your interior clean and protected, see the Polishing & Detail project section.
Please be Advised
The recommendations and process steps listed in the projects below are general do-it-yourself recommendations that are designed to produce a successful project. Due to the many variables involved with each project and process steps, Touch Up Zone cannot guarantee results and does not accept liability for incorrect product application or use.
Before you Start
- Always wear proper safety protection: Safety Glasses, Respirator, Particle Mask, Latex or Nitrile Gloves and Hearing Protection (if you are using power tools that emit high noise levels).
- Utilize a well ventilated area when spraying coatings or sanding.
- Make sure the temperature is warm enough to allow coatings and materials to dry properly.
- Work in a well lighted area where you can clearly see what you are doing.
- Always follow label instructions on products.
Tools, Equipment, Paint and Material Options
The Tools, Equipment, Paint and Materials recommended for the each project are listed in the repair procedure and are highlighted in Red. You can purchase the Tools, Equipment, Paint and Materials for these products by clicking on the button below. For product definitions and general tech tips click here.


