The front and rear plastic bumper covers are attached to the metal bumpers on the vehicle. Most plastic bumper covers are painted to match the color of the vehicle car body. The front and rear bumper covers on a vehicle take a lot of abuse and are subjected to rock chips, shopping cart collisions, and “bumps” with other vehicles. When your bumper cover gets scratched, scraped, or gouged, you can repair the bumper yourself using the products and procedures outlined below.
Flexible Plastic Bumper Cover damage repair procedures generally below fall into three categories categories
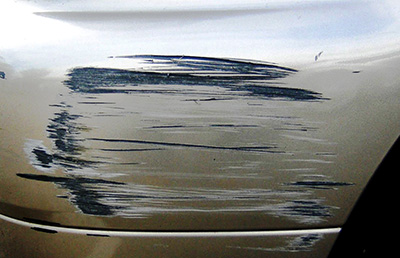
Click Below for Step-by-Step Instructions – Minor, Medium and Major Plastic Bumper Damage
Minor Damage: Minor scratches or scrapes that can be repaired simply by sanding and polishing.
The first step in repairing a plastic bumper cover is to understand the extent of the damage. If the scratches and scrapes on the bumper cover are not deep they should be easily removed with Rubbing Compound and/or light sanding.
Try using Rubbing Compound first to remove scratches before you begin sanding.
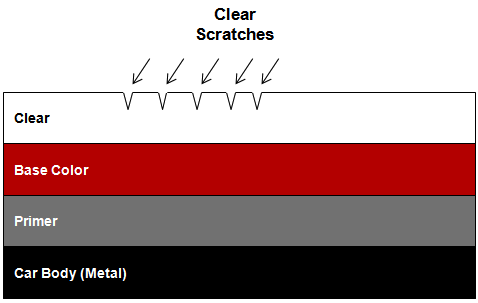
If you can run your fingernail across the scratch and catch your nail on the scratch, the scratch has probably penetrated the clearcoat (see Illustration 1-1) and will require light sanding and compounding to repair properly.
The 3M Scratch Removal System Kit has everything you need to complete this repair.
Step 1 – Sand Scratch Flat with 3000 Grit Abrasive
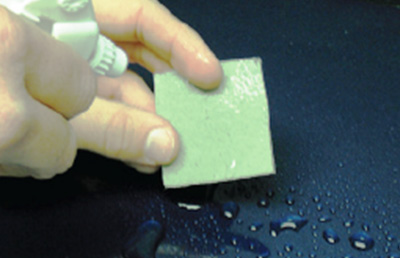
- Spray water onto the green/gray side of the 3000 Grit Abrasive Square and onto the area to be repaired (wet sanding requires water).
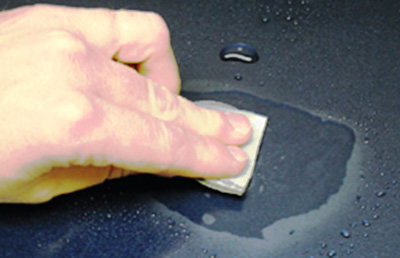
- Use the 3000 Grit Abrasive Square to wet sand the area of the scratch, working in no more than a 4 inch x 4 inch section.
- Use light to medium pressure, keeping the sandpaper flat on the surface.
- White slurry will form as you sand the scratch.
- Wipe the area frequently with a Rubber Squeegee to check your progress and determine if the scratch has been removed.
- Check your work every 10 – 15 seconds. Look at the area from all angles to make sure the scratch has been removed.
- Continue to wet sand using water and the 3000 Grit Abrasive Square until the scratch is gone (take caution not to sand through the clearcoat).
- Wipe the area with a clean, dry Disposable Towel.
Helpful Tip: When wet sanding, use a Plastic Spray Bottle filled with clean water to help keep the area lubricated with water while sanding.
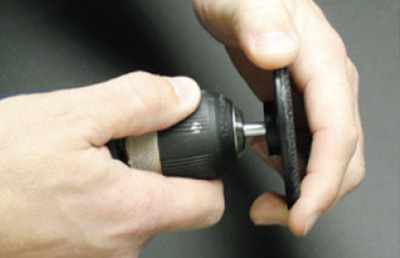
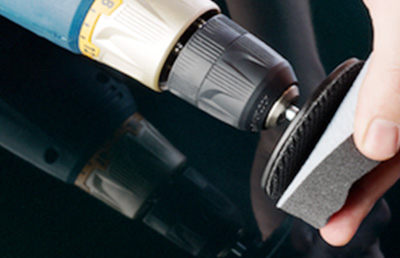
Step 2 – Attach Disc Pad Holder and Purple Pad
- Attach the Disc Pad Holder onto your Drill.
- Attach and center the Purple Compounding Pad onto the Disc Pad Holder.
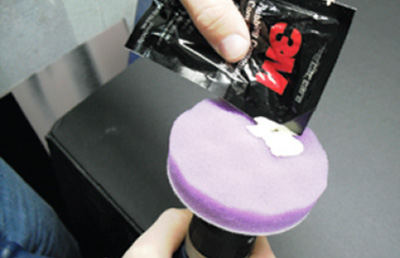
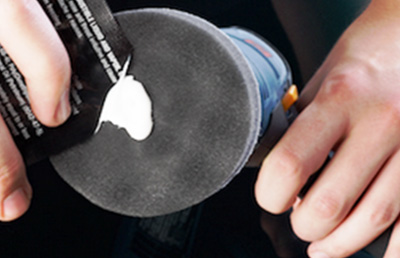
Step 3 – Apply Rubbing Compound to Purple Pad
- Squeeze a quarter-sized amount of Rubbing Compound onto the Purple Compounding Pad.
- Smear the compound over the work area before turning on the Drill.
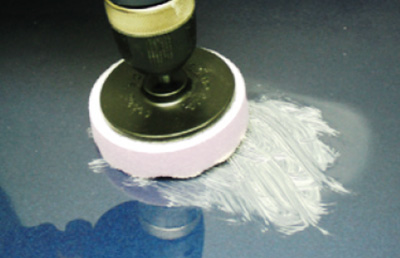
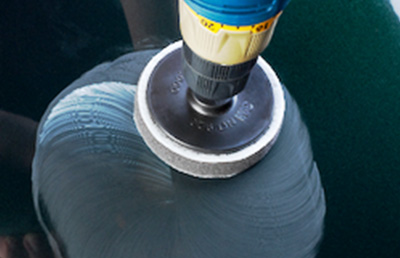
Step 4 – Buff Sanded area with Rubbing Compound
- Buff at light to medium pressure, extending the buffing area about a pad width beyond the repair spot.
- Buff in up and down, side to side motions. (Note: Use caution around door handles and at the edges of panels where paint may be thinner.)
- Reduce pressure as the compound dries.
- Repeat this step if any sanding scratches are still visible.
- Wipe the area with a clean, dry Disposable Towel.
- The Purple Compounding Pad can be rinsed out with water and reused.
Step 5 – Remove Purple Pad and replace it with Black Pad
- Remove the Purple Compounding Pad from the Disc Pad Holder and replace it with the Black Polishing Pad.
Step 6 – Apply Polishing Compound to Purple Pad
- Squeeze a quarter-size amount of Polishing Compound or Scratch Removing Compound onto the Black Polishing Pad.
- With the Drill turned off, spread the Polishing Compound or Scratch Removing Compound over the sanded area.
Step 7 – Buff Sanded area with Rubbing Compound
- Turn Drill on and buff the sanded area using light to medium pressure at a comfortable speed.
- You only need to apply enough pressure to compress the Black Polishing Pad onto the surface.
- Work side to side, and then up and down motions until the entire area is polished.
- Reduce pressure as the polish dries and desired shine is achieved.
- Repeat process as needed.
- Finish buffing the area with a clean Microfiber Towel.
- The Black Polishing Pad can be rinsed out with water, dried and reserved for future use.
Helpful Tip: When finished, use a Synthetic Wax to protect area.
Medium Damage: Deeper scratches or scrapes that can only be repaired by repainting.
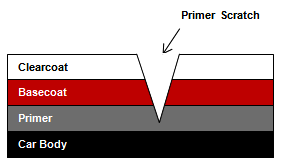
Medium scratches will penetrate the clearcoat and basecoat layers to reveal the primer underneath (see Illustration 1-2). These deeper scratches can be repaired by sanding, filling, priming, and repainting with color and clear.
Step 2 – Clean the Bumper Thoroughly
- Spray or wipe the bumper cover with Wax and Grease Remover to remove dirt, grease, oil and other contaminants.
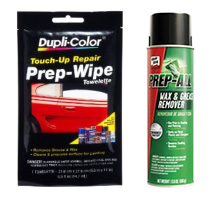
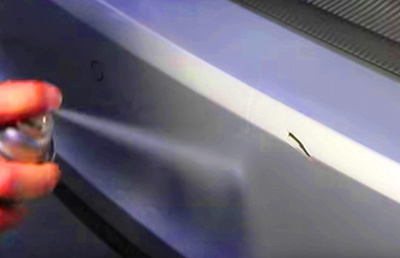
Step 3 – Sand the Scratch, Scrape or Gouge
- Wet sand the scratch, scrape or gouge by hand first with coarse grit sandpaper using 220 Grit Wetordry Sandpaper or dry sand by hand using 180 Grit Production Sandpaper, or sand by machine using a DA Sander and a 180 Grit Sandpaper Disc.
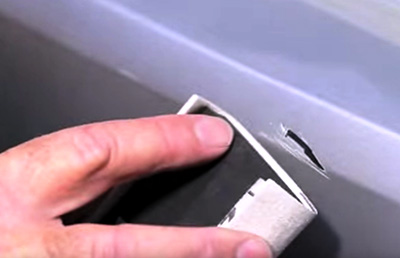
Step 4 – Feather Edge the Scratch, Scrape or Gouge
- Feather edge and “flatten” the scratch, scrape or gouge with coarse grit sandpaper by hand using 220 Grit Wetordry Sandpaper or dry sand by hand using 180 Grit Production Sandpaper, or by machine using a DA Sander and a 180 Grit Sandpaper Disc.
- Switch to finer grit sandpaper to finish featheredging the scratch, scrape or gouge. Use 400 Grit Wetordry Sandpaper by hand or dry sand by hand using 320 Grit Production Sandpaper, or sand by machine using a DA Sander and a 320 Grit Sandpaper Disc.
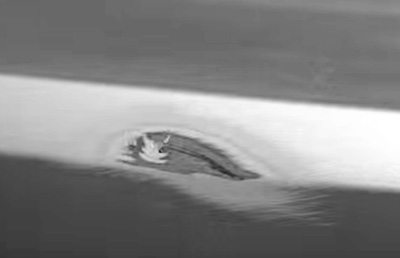
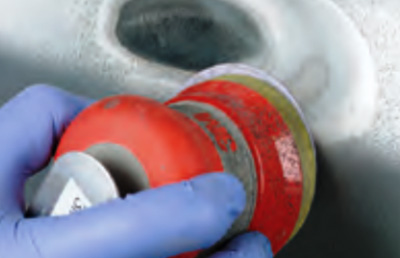
Step 5 – Use Putty to Fill Remaining Scratches
- If you still have noticeable scratches, scrapes or gouges in the bumper cover after sanding and featheredging, apply a coat of Body Putty over the area.
- Spread Body Putty into the scratches, scrapes or gouges with a 2“or 4” Spreader.
- Allow Body Putty to dry approximately 15 minutes @ 70° F
- Once Body Putty has dried completely, sand Body Putty smooth by wet sanding by hand using 400 Grit Wetordry Sandpaper or dry sanding by hand using 320 Grit Production Sandpaper, or sand by machine using a DA Sander and a 320 Grit Sandpaper Disc.
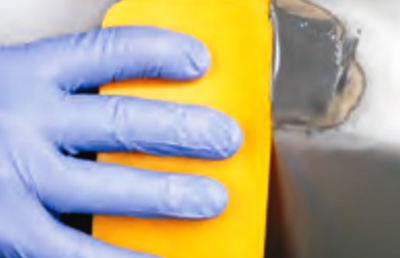
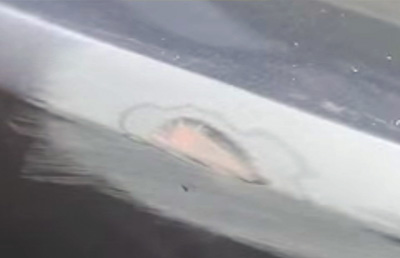
Step 6 – Mask off Area to Be Painted
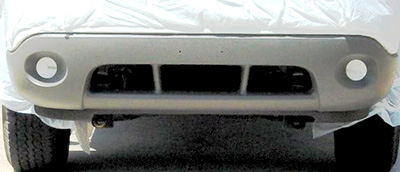
- If painting the entire bumper cover, mask off the area surrounding the entire bumper cover.
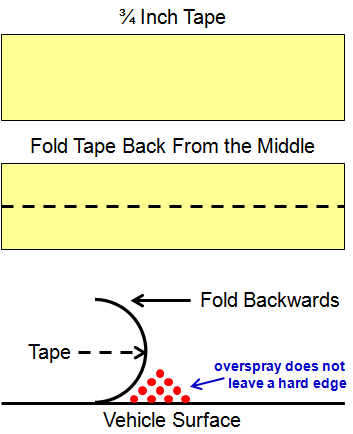
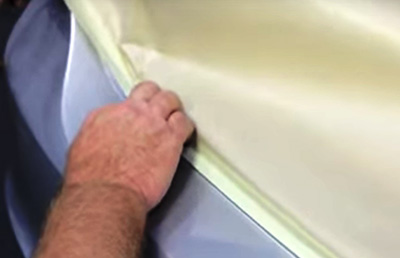
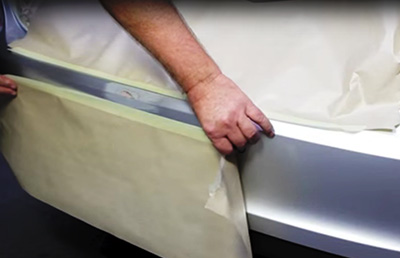
- If spot blending, mask off the area around the repair. Use Tape to back mask to avoid having the overspray from Primer, Base Color, or Clear leave a hard edge (see Back Masking illustration below).
Step 7 – Apply Primer
- Spray or wipe the bumper cover with Wax and Grease Remover to remove dirt, grease, oil and other contaminants before applying Primer.
- Allow entire area to dry thoroughly.
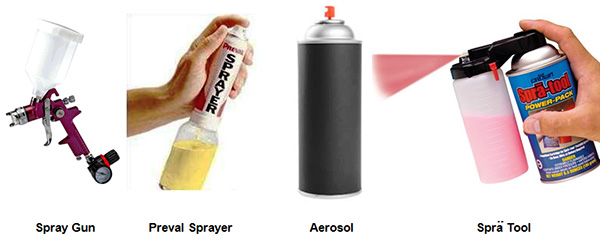
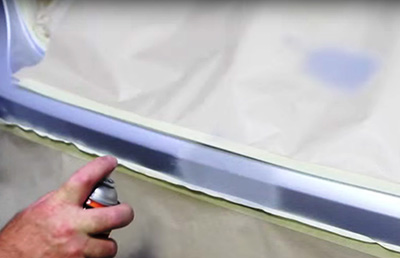
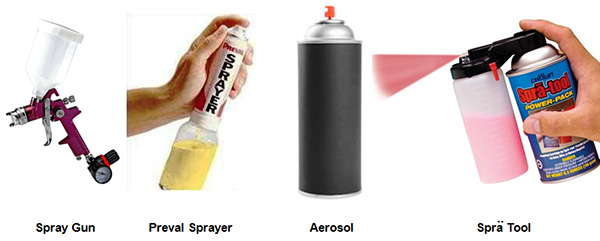
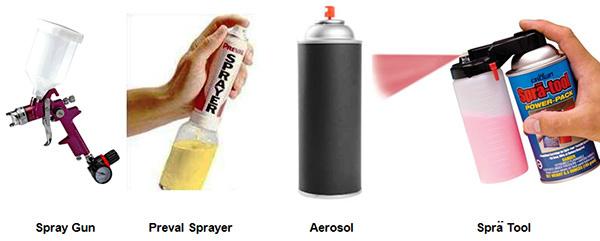
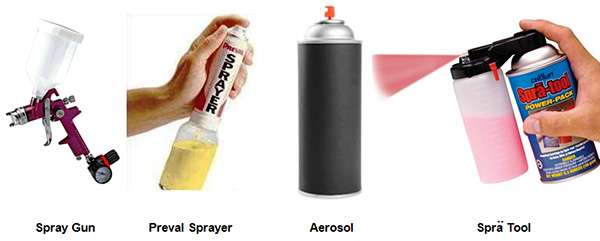
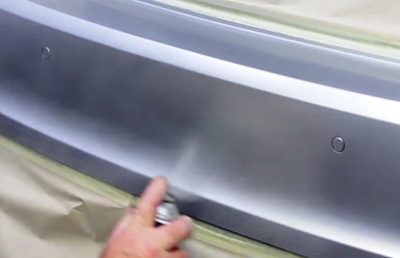
- Once the area is completely dry, apply a light coat of Primer using an Aerosol Can, Spray Gun, Preval Sprayer or Spra Tool (see spray equipment options on right) over the sanded area (your optimal spray temperature should be between 65° F to 85° F). Allow Primer to dry about 2 to 3 minutes.
- Spray 2 to 3 additional medium wet coats of Primer over the repair area with a 2 to 3 minute flash off between coats (do not pile heavy coats of Primer).
- Let Primer dry 20 to 30 minutes before sanding (longer if temperature is cooler than 65° F).
Spray Equipment Options
Tape is Folded Backwards
Step 8 – Sand Primer
- Once Primer has dried, sand smooth by wet sanding by hand with 400 Grit Wetordry Sandpaper or dry sanding by hand with 320 Production Sandpaper, or sanding by machine using a DA Sander and a 320 Sandpaper Disc.
- If you notice sanding scratches are still present, apply 2 -3 additional coats of Primer.
- Final sand Primer smooth by wet sanding with 800 Grit Wetordry Sandpaper by hand or dry sanding by hand with 600 Grit Production Sandpaper, or sanding by machine using a DA Sander and a 600 Grit Sandpaper Disc.
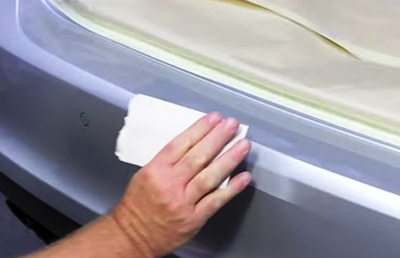
Step 9 – Compound Blend Area for Spot Blending*
- You have the option of painting the entire bumper cover, or spot blending over just the repaired area.
- If you plan on spot blending, you will need to use Rubbing Compound to compound the area around the repair.
- Dab Rubbing Compound on the area about 18 inches (1 & ½ feet) beyond the repair.
- Rub the compound into the surrounding area by hand or machine.
The Rubbing Compound has a slight abrasive that will help create adhesion of Base Color and Clear to the bumper cover.
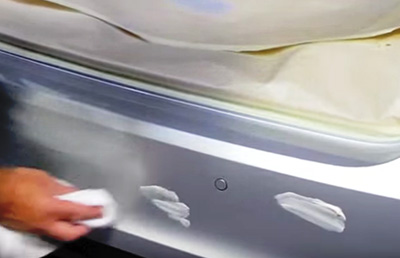
Step 10 – Apply Base Color
- Spray or wipe Wax & Grease Remover to clean the panel a final time to remove all dirt, oil, and contamination before spraying Base Color and Clear.
- Once dry, use a Tack Cloth to lightly wipe away any dust or dirt.
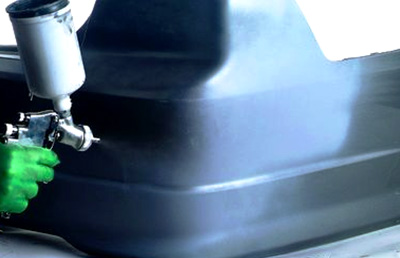
- Apply 2 to 3 medium wet coats of Base Color over the primed area using an Aerosol Can, Spray Gun, Preval Sprayer or Spra Tool (see spray equipment options).
- Allow Base Color to dry about 5 minutes.
- Once Base Color has dried and Primer is covered (not showing through the Base Color, begin to blend out the Base Color about 2 to 3 inches beyond the area using light coats.
- Continue to extend out each coat of Base Color until you are satisfied with the blend.
- Make sure your Base Color has a uniform finish (not blotchy looking) before applying Clear.
Helpful Tip: Spray up and down then back and forth to remove blotchiness. Using good atomizing spray equipment helps greatly
Spray Equipment Options
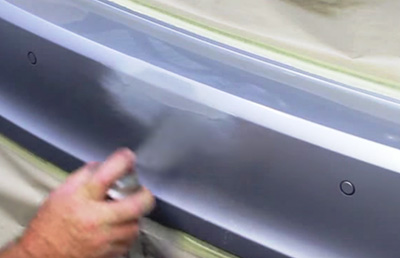
Step 11 – Apply Clear
- Allow Base Color to dry 15 to 20 minutes (@ 70° F – longer for colder temperatures) before applying Clear.
- Apply 3 to 4 medium wet coats of Clear over Base Color.
- Allow for a 2 to 3 minute flash off between coats.
- Immediately after your last coat of Clear, use Edge Blender to melt the dry edge of the Clear.
- Hold the Edge Blender aerosol about 8 to 10 inches away from the Clear and apply a very light coat only on the edge of the Clear (do not spray over the entire repair area – only the dry edge of the clear).
- Let the Edge Blender flash off and then examine the repair.
- You can apply an additional coat of Edge Blender on the edge if you see any dry areas where melt-in is needed.
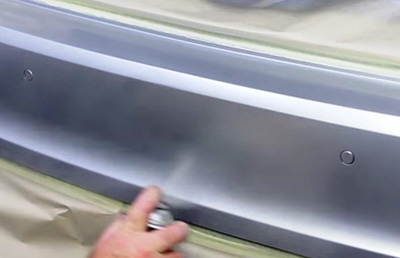
Step 12 – Compounding & Polishing
- Allow the Clear to dry completely before removing Tape and Masking Paper.
- If you are happy with gloss and overall results, your repair is completed.
- If you have some haze or small dust and dirt that you would like to remove, or want to increase overall gloss, you can lightly wet sand and compound the area. Allow Clear to dry overnight before wet sanding and compounding.
- To wet sand, use 1500 Grit Wetordry Sandpaper or finer sandpaper and water to lightly sand the Clear.
- Once area is dry, use Rubbing Compound to compound the area back to a glossy finish.
Follow with Polishing Compound to finish the repair.
See also Polishing & Detail
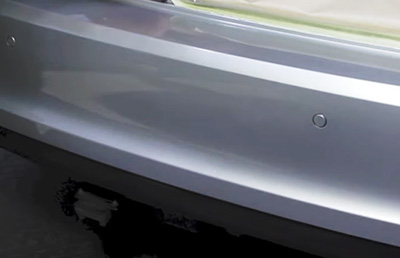
*Painting the Entire Bumper Cover
- If you are worried about spot blending the color, you can paint the entire bumper cover.
- Clean the entire bumper cover with Bumper Prep Paste, rinse with clean water, and dry thoroughly.
- Once the bumper cover is completely dry, Use Tape, Masking Paper and/or Plastic Sheeting to mask off the adjacent areas to avoid overspray from landing on adjacent surfaces.
- Apply Primer and Body Putty as needed to fill scratches, allow to dry, then wet sand by hand using 800 Grit Wetordry Sandpaper or dry sand by hand using 600 Grit Production Sandpaper, or sand with machine using a DA Sander and a 600 Grit Sandpaper Disc.
- Spray or wipe Wax & Grease Remover to clean the panel a final time to remove all dirt, oil, and contamination before spraying Base Color and
- Once dry, use a Tack Cloth to lightly wipe away any dust or dirt.
- Apply 2 to 3 medium wet coats of Base Color over the primed area using an Aerosol Can, Spray Gun, Preval Sprayer or Spra Tool (see spray equipment options).
- Apply 1 to 2 additional coats of Base Color over the rest of the bumper cover.
- Allow Base Color to dry 15 to 20 minutes (@ 70° F – longer for colder temperatures) before applying Clear.
- Apply 3 to 4 medium wet coats of Clear over Base Color.
- Allow for a 2 to 3 minute flash off between coats.
- Allow the Clear to dry completely before removing Tape and Masking Paper.
You can polish the entire repair area with Rubbing Compound and Polishing Compound after the Clear has dried overnight.
Spray Equipment Options
Major Damage – Damage to the bumper cover to include holes, punctures, dents and tears that will require adhesives, filler and paint to repair.
Major damage to the bumper cover includes holes and tears (see Illustration 1-3) that can be repaired without having to spend hundreds of dollars replacing the bumper cover. Fixing holes and tears will require access to the front and back of the plastic bumper cover. To access the back of the bumper cover you will have to remove the bumper cover from the vehicle.
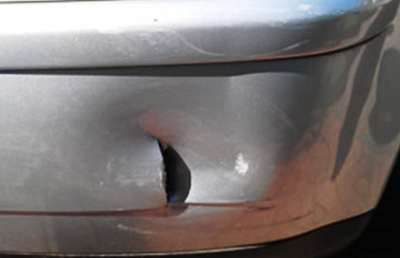
Illustration 1-3
Step 2 – Remove the Plastic Bumper Cover
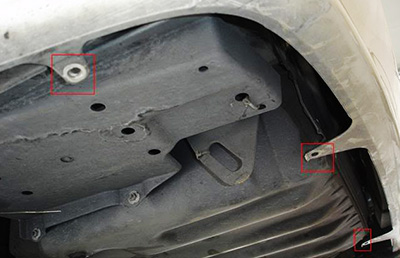
- Locate the screws and bolts that attach the bumper cover to the vehicle (for rear bumpers they are usually found behind the wheel wells, under the tail lights and below the trunk latch)
- To get to the screws behind the wheel wells in the rear, remove the inner plastic wheel well with a Trim Panel Tool to remove clips, a screwdriver to remove screws and a ratchet and socket to remove any bolts holding the bumper cover to the vehicle.
- You can ask your local car dealership if they have a Factory Service Manual that illustrates how to remove the bumper cover for your specific vehicle.
- Information can also be found in online automotive forums.
- Remove the bumper cover from the vehicle
Step 3 – Clean and Prep the Bumper Cover
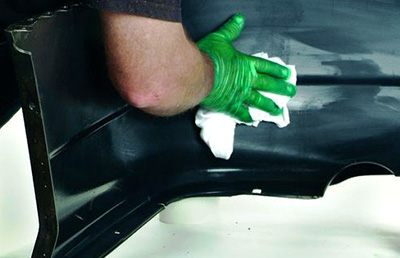
- Clean the front and back of the bumper cover with a Bumper Prep Paste, Grey Scuff Pad and clean water..
- Bumper Prep Paste will create adhesion and remove any mold release agents, wax, grease and oil.
- Rinse with clean water and dry thoroughly.
- Once completely dry, spray or wipe with Wax & Grease Remover to remove any remaining oil and contamination before sanding (Wax & Grease Remover will minimize contaminants from reacting with primer, paint and clear to create “fisheyes”).
Step 4 – Sand and Groove the Tear from the Front
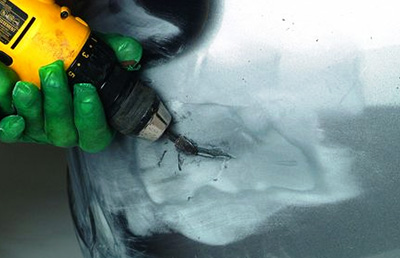
- Remove any ragged edges around the tear or hole in the front by sanding around the edge by hand with 80 Grit Production Sandpaper and a Sanding Pad or Sanding Block or by machine with a DA Sander and 80 Grit Sandpaper Disc.
- Create a “V” shape around the tear or hole using a Drill (or Air Grinder) with a 36 Grit Abrasive Disc (at low RPM) or with Drill and Rotary Burr Attachment.
Step 5 – Apply Reinforcement Tape to Back of Bumper
- Sand the area surrounding the tear or hole on the back side of the bumper cover using a Drill (or Air Grinder) with a 36 Grit Abrasive Disc (at low RPM).
- Use Plastic Repair Reinforcing Tape to lay over tear or hole on the back side of the bumper cover, extending about 2 inches beyond the area of the tear or hole.
- Use a 2“or 4” Spreader to press the Plastic Repair Reinforcing Tape firmly into place and to eliminate any air pockets in the tape.
- Use Flexible Filler for Plastic to spread on top of the Plastic Repair Reinforcing Tape. The Flexible Filler for Plastic is a two-part epoxy designed specifically for plastics. Mix Part A and Part B together for a uniform material that you can spread with a 2“or 4” Spreader.
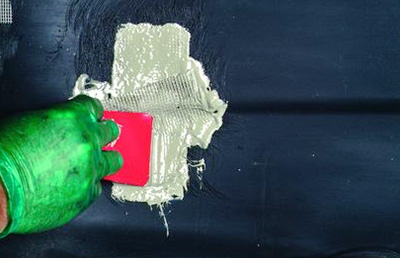
Step 6 – Apply Flexible Filler to Front
- Sand around the tear or hole on the front side of the bumper cover as well as any material that may have squeezed through from the back by hand with 80 Grit Production Sandpaper and a Sanding Pad or Sanding Block or by machine with a DA Sander and 80 Grit Sandpaper Disc.
- Apply Flexible Filler for Plastic on top of the tear or hole on the front side of the bumper cover. The Flexible Filler for Plastic is a two-part epoxy designed for plastics. Mix Part A and Part B together for a uniform material that you can spread with a 2“or 4” Spreader.
Allow the Flexible Filler for Plastic to completely cure for one hour @ 70° F and longer if cooler than 70° F.
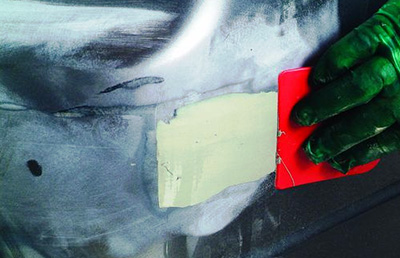
Step 7 – Sand and Contour
- Once the Flexible Filler for Plastic has fully cured, sand the front of the bumper cover by hand with 80 Grit Production Sandpaper and a Sanding Pad or Sanding Block or by machine with a DA Sander and 80 Grit Sandpaper Disc to match the contour of the bumper cover.
- Switch to finer grit sandpaper and sand by hand using 180 Grit Production Sandpaper and a Sanding Pad or Sanding Block or by machine using a DA Sander and 180 Grit Sandpaper Disc to remove coarse 80 grit scratches.
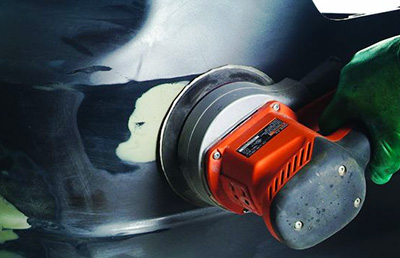
Step 8 – Use Putty to Fill Scratches and Pinholes
- Inspect bumper cover after sanding the repair area.
- If you find any additional small holes or scratches, fill with Body Putty.
- Spread Body Putty into small holes or scratches with a 2“or 4” Spreader.
- Allow Body Putty to dry approximately 15 to 20 minutes @ 70°
- Once Body Putty has dried, sand smooth by wet sanding by hand using 400 Grit Wetordry Sandpaper or dry sanding by hand using 320 Grit Production Sandpaper, or sanding by machine using a DA Sander and a 320 Grit Sandpaper Disc.
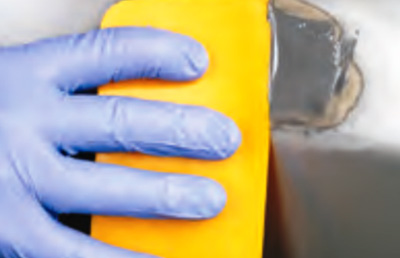
Step 9 – Mask Area, Apply Primer and Sand
- Mask off any areas that you do not want to get overspray on with Tape and Masking Paper and/or Plastic Sheeting.
- Spray or wipe the bumper cover with Wax and Grease Remover to remove dirt, grease, oil and other contaminants.
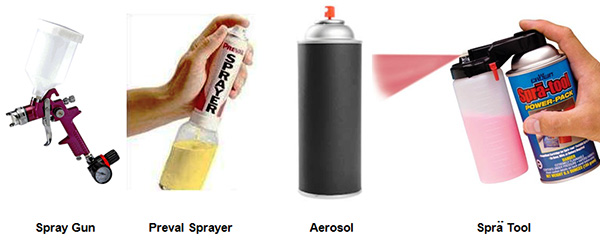
- Once the area is completely dry, using an Aerosol Can, Spray Gun, Preval Sprayer or Spra Tool (see spray equipment options on right) apply 2 to 3 medium wet coats of Primer over the sanded area with a 2 to 3 minute flash off between coats (your optimal spray temperature should be between 65° F to 85° F).
- Let Primer dry 20 to 30 minutes before sanding (longer if temperature is cooler than 65° F).
- Once Primer has dried, sand smooth by wet sanding by hand with 400 Grit Wetordry Sandpaper or dry sanding by hand with 320 Production Sandpaper, or sanding by machine using a DA Sander and a 320 Sandpaper Disc.
- If you notice scratches or imperfections are still present, repeat Primer application and sanding process.
Spray Equipment Options
Step 10 – Apply Base Color
- Once Primer has dried, final sand Primer smooth by wet sanding with 800 Grit Wetordry Sandpaper by hand or dry sanding by hand with 600 Grit Production Sandpaper, or sanding by machine using a DA Sander and a 600 Grit Sandpaper Disc.
- Final sand the entire bumper with 800 Grit Wetordry Sandpaper by hand or dry sanding by hand with 600 Grit Production Sandpaper, or sanding by machine using a DA Sander and a 600 Grit Sandpaper Disc.
- Mask off any areas that you do not want to get overspray on with Tape and Masking Paper and/or Plastic Sheeting.
- Spray or wipe Wax & Grease Remover to clean the panel a final time to remove all dirt, oil, and contamination before spraying Base Color and Clear.
- Once dry, use a Tack Cloth to lightly wipe away any dust or dirt.
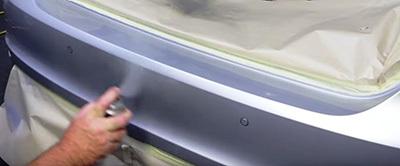
- Apply 2 to 3 medium wet coats of Base Color over the primed area and the entire bumper cover using an Aerosol Can, Spray Gun, Preval Sprayer or Spra Tool (see spray equipment options).
- Allow Base Color to dry about 3 to 5 minutes between coats.
- Make sure your Base Color has a uniform finish (not blotchy looking) before applying Clear.
Helpful Tip: Spray up and down then back and forth to remove blotchiness. Using good atomizing spray equipment helps greatly.
Spray Equipment Options
Step 11 – Apply Clear
- Allow Base Color to dry 15 to 20 minutes (@ 70° F – longer for colder temperatures) before applying Clear.
- Apply 3 to 4 medium wet coats of Clear over Base Color.
- Allow for a 2 to 3 minute flash off between coats.
- Allow Clear to dry before removing Tape and Masking Paper.
- If you are happy with gloss and overall results, your repair is completed.
- If you have some haze or small dust and dirt that you would like to remove, or want to increase overall gloss, you can lightly wet sand and compound the area. Allow Clear to dry overnight before wet sanding and compounding.
- To wet sand, use 1500 Grit Wetordry Sandpaper or finer sandpaper and water to lightly sand the Clear.
- Once area is dry, use Rubbing Compound to compound the area back to a glossy finish.
- Follow with Polishing Compound to finish the repair.
Please be Advised
The recommendations and process steps listed in the projects below are general do-it-yourself recommendations that are designed to produce a successful project. Due to the many variables involved with each project and process steps, Touch Up Zone cannot guarantee results and does not accept liability for incorrect product application or use.
Before you Start
- Always wear proper safety protection: Safety Glasses, Respirator, Particle Mask, Latex or Nitrile Gloves and Hearing Protection (if you are using power tools that emit high noise levels).
- Utilize a well ventilated area when spraying coatings or sanding.
- Make sure the temperature is warm enough to allow coatings and materials to dry properly.
- Work in a well lighted area where you can clearly see what you are doing.
- Always follow label instructions on products.
Tools, Equipment, Paint and Material Options
The Tools, Equipment, Paint and Materials recommended for the each project are listed in the repair procedure and are highlighted in Red. You can purchase the Tools, Equipment, Paint and Materials for these products by clicking on the button below. For product definitions and general tech tips click here.


