Whether you have a new or used vehicle, proper cleaning and detailing techniques will help keep the vehicle exterior and interior condition in good shape. There is a vast amount of information available for the vehicle owner to utilize regarding car care. The products and procedures outlined below are designed to help you repair and enhance your vehicle inexpensively yourself with great results.
The Polishing & Detail Projects and Procedures below fall into two categories – Exterior Detail and Interior Detail:
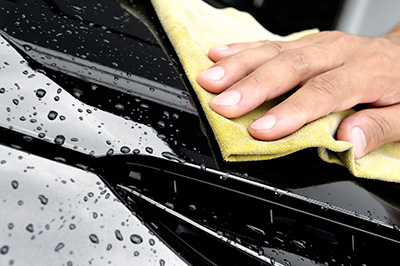
Click Below for Step-by-Step Instructions – Polishing and Detailing
1. Exterior Detail
Wash Wheels & Tires
When washing your vehicle, always start with the wheels and tires. Make sure your cleaner is safe for the type of wheel you are cleaning. A Non-Acid Tire & Wheel Cleaner is safe to use on any wheel and will clean tires and rims at the same time. The Non-Acid Tire & Wheel Cleaner is a blend of powerful degreasing agents, surfactants and solvents attacks the grease, dirt and brake dust, breaking its bond with the rim.
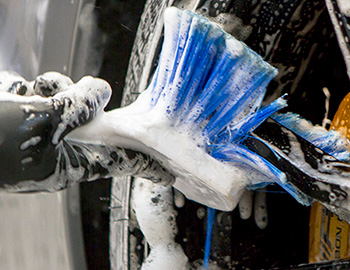
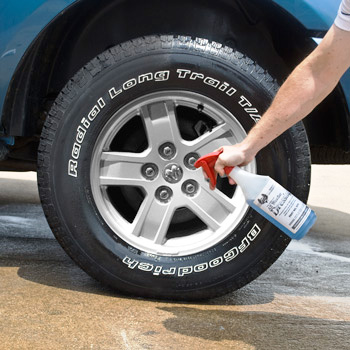
Step 1 – Apply Cleaner to One Rim at a Time
- Fill a Spray Bottle with Non-Acid Tire & Wheel Cleaner and spray the cleaner directly onto wheels and tires.
- Do not spray Non-Acid Tire & Wheel Cleaner onto a hot rim surface – make sure rims have cooled down to less than 80°
- Clean one wheel at a time to prevent the Non-Acid Tire & Wheel Cleaner from drying on the rim.
- Leave the cleaner on the rim for 2 to 4 minutes to allow product to dissolve brake dust, dirt, grease and grime.
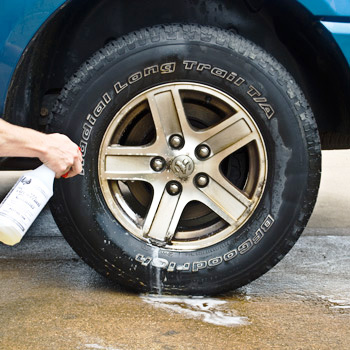
Step 2 – Use Soft Bristle Brush to Loosen Dirt, Dust and Grime
- If the wheel is extremely dirty, some light scrubbing with a Deluxe Wheel Brush will help to loosen dirt, dust and grime.
- Scrubbing the tire will also help remove old dressing that may make your tire look dull.
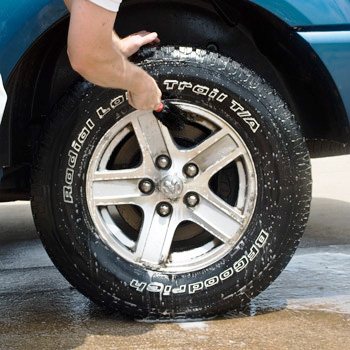
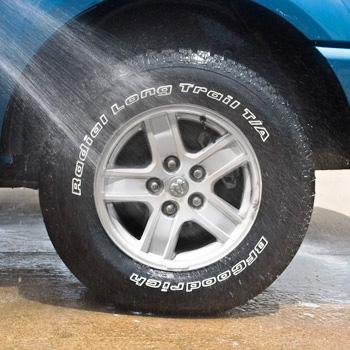
Step 3 – Rinse Thoroughly with Water
- Rinse thoroughly with a strong jet of water.
- After rinsing with water, move onto the next tire and wheel.
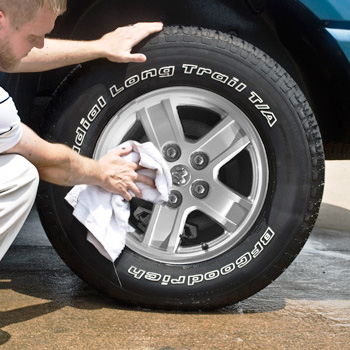
Step 4 – Dry Thoroughly with a Clean Towel
- Dry the tires and wheels with a clean absorbent towel to prevent water spots and to make sure all of the dirt and grime is completely removed
Step 5 – Apply Tire Dressing
- Before applying Silicone Free Tire Dressing, finish washing the rest of the vehicle.
- Once your vehicle, wheels and tires have been cleaned and dried, you can apply a Silicone Free Tire Dressing on the tire to restore a rich color and gloss to the tire surface that may have been faded by exposure to sunlight and weathering.
- A Silicone Tire Dressing is also available
Wash Vehicle Surface
There is a right way and wrong way to wash your vehicle. Washing incorrectly can contribute to scratches and swirl marks in your vehicle’s finish. Outlined below are suggestions for washing your vehicle to yield optimal results.
Helpful Tips:
- Do Not wash car if the surface is hot. A hot surface will accelerate evaporation of the water and soap leading potentially to water spotting.
- Do Not wash car in the sun. For the same reasons for not washing a hot car, the sun will help accelerate evaporation which could lead to water spotting.
- Do Not use dish soap to wash your car (this will diminish any car wax that you may have on the finish).
- Wash tires and rims first.
- Pre treat trouble spots such as tree sap, bugs and bird droppings with undiluted car soap.
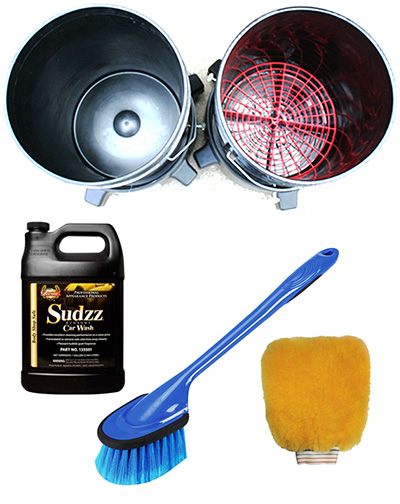
Step 1 – Use the Proper Tools & Supplies
- Use Car Wash Soap instead of dish detergent.
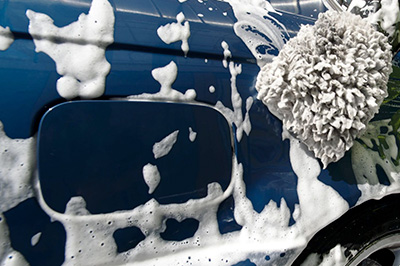
- Use a Wash Mitt that can trap and remove dirt.
- Set up two Wash Buckets – one with clean water and the other with Car Wash Soap. You will rinse the Wash Mitt in clean water and then submerse in Car Wash Soap to minimize reapplication of dirty water onto your finish and to maximize the life of your Car Wash Soap.
- Use a Grit Guard for the bottom of your the Car Wash Soap bucket to allow dirt to settle to the bottom of the bucket and away from your Wash Mitt.
- Use a soft Wash Brush for areas like the front grill and headlights.
Step 2 – Rinse Vehicle to Remove Loose Dirt
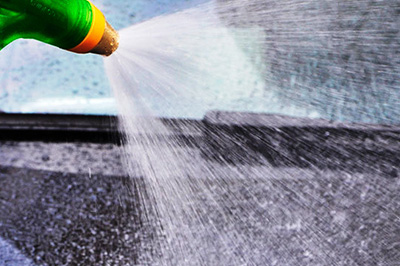
- Park your car in the shade and let the surface temperature cool down before you start rinsing.
- Lift your windshield wipers they are off of the windshield.
- Start spraying on the top of the car, starting at the roof and working down to the bottom of the car, with clean water.
- Rinse the vehicle thoroughly and remove as much loose dirt and dust as possible.
Helpful Tip: Washing on the grass will help reduce runoff of dirty water, soap and detergents into local drains and the water supply.
Step 3 – Pre Treat Trouble Spots prior to Washing
- After rinsing, you may notice trouble spots on your vehicle surface such as residue from bugs, bird droppings or tree leafs.
- For bugs, pre treat with Bug Release and/or undiluted Car Wash Soap.
- For bird droppings, pre treat with Spider and Bird Residue Remover and/or undiluted Car Wash Soap.
- For tree leaf stains, pre treat with Heavy Duty Cleaner (dilution ratio of 1:10) and/or undiluted Car Wash Soap.
- For tree sap and road tar, spray or wipe area with Wax & Grease Remover (please note: this will also remove wax and polish).
- If the residue has been on the vehicle surface for some time, it may have etched a stain in the surface that will require using a Clay Bar, compounding, or wet sanding and compounding to remove.

Step 4 – Wash Vehicle
- Fill two buckets – one Soap Bucket (filled with Car Wash Soap and clean water) and one Rinse Bucket (filled only with clean water).
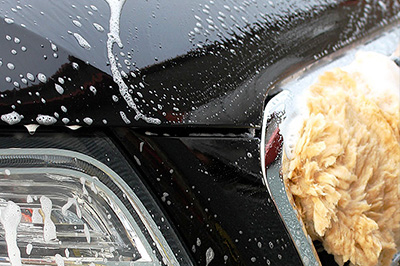
- Once your vehicle is thoroughly wet from rinsing, submerse a clean Wash Mitt in the Soap Bucket and start gently washing your vehicle, starting at the roof and working downwards.
- Rinse the Wash Mitt every time in the Rinse Bucket before dipping back into the Soap Bucket.
- Work one section of the vehicle at a time rinsing frequently with a hose and clean water.
Helpful Tip: Putting a Grit Guard at the bottom of the Soap Bucket will allow you to drop the Wash Mitt in the bucket without it contacting dirt and debris at the bottom of the bucket.
Step 5 – Rinse and Dry your Vehicle
- Rinse all the soap from your vehicle with clean water.
- Dry the surface with a Drying Cloth specifically designed to not scratch or harm your vehicle surface.
- Do not let the water simply evaporate on the surface – this could lead to water spotting or streaking.
- Use the Drying Cloth as a sponge to absorb the water and wipe it from the surface.
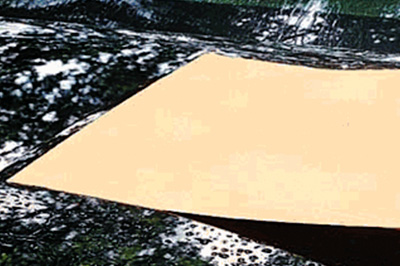
Helpful Tip: To remove water quickly from the surface, you can also use a Water Blade (pictured right) that will help squeegee the water from the surface very quickly saving some time.

Clay Bar Vehicle Surface
For many vehicle owners, the Clay Bar is an essential tool for keeping their vehicle looking its best. For those that have never used a Clay Bar before, they may not understand the benefit of using one, and don’t understand how to properly use one. A Clay Bar is actually very easy to use, but it must be used properly (follow the procedures below). Using a Clay Bar on your paint finish two or three times a year will keep your paint looking factory fresh. You can also use it on glass and chrome.
Using a Clay Bar will help make your vehicle surface smoother and cleaner than washing alone. A Clay Bar helps remove surface contamination such as industrial fallout, brake dust, rail dust, tree sap, bug residue, tar, acid rain deposits and overspray. It does not, however, remove swirl marks, scratches and etchings that have penetrated the surface. As you can see in Illustration 1-1, many of the defects that lay on top of the surface have been removed with a Clay Bar, but you will need Rubbing Compound (and perhaps wet sanding) and a Hi Speed Polisher to remove defects that have penetrated the surface such as scratches, swirl marks, and etchings.
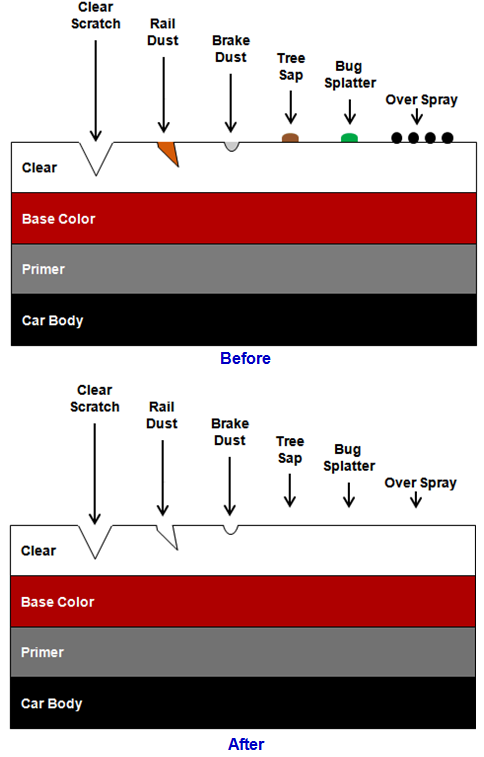
Illustration 1-1
Step 1 – Prepare the Clay Bar
- After you have washed and dried your vehicle thoroughly to remove as much of the dirt, grime, and other contaminants from the surface as possible, you are ready to use the Clay Bar.
- It is advised that you cut the Clay Bar into thirds or quarters before you start.
- This way, if you happen to drop a piece you can simply discard it.
- It is not recommended that you reuse a piece that has been dropped because it may have collected dirt or debris on it that can scratch the surface.
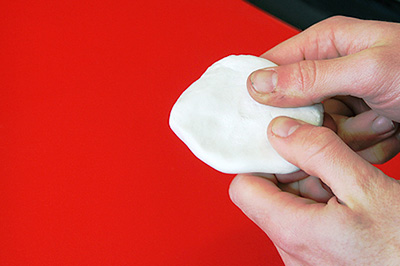
- Knead the smaller pieces into a flat pancake for easier use.
Step 2 – Lubricate the Clay Bar and Surface
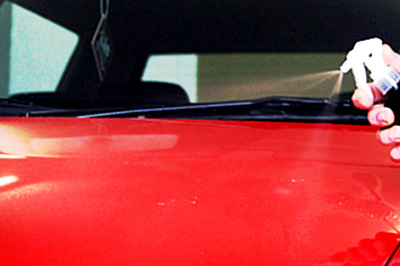
- It is critical that you use a lubricant like Mist N Shine underneath the Clay Bar when using the Clay Bar on the surface of the vehicle.
- Work in a 2 foot by 2 foot section at a time.
- Spray Mist N Shine on the 2 foot by 2 foot section that you intend to use the Clay Bar on.
- Also spray Mist N Shine on the Clay Bar
- Do not use the Clay Bar on an un-lubricated surface. The vehicle surface must lubricated first. Using the Clay Bar without lubrication may create scratches in the surface.
Step 3 – Gently Glide Clay Bar over Vehicle Surface
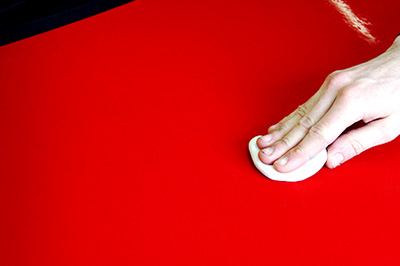
- Using light pressure, gently glide or slide the Clay Bar over the lubricated surface.
- Use a back and forth motion in one direction only.
- Allow the Clay Bar to pull the contamination from the surface. Some surface contamination may require a little time and several passes to get the surface completely smooth.
- Be very cautious about applying too much pressure to the Clay Bar, and make sure the Clay Bar and vehicle surface are well lubricated with Mist & Shine.
- If the Clay Bar looks like its accumulating quite a bit of contamination, replace it with a new piece.
Step 4 – Dry to a Smooth and Glossy Finish
- Before the cleaned area dries, wipe dry to a smooth and glossy finish using a clean Micro Fiber Cloth.
- You should always Wax the paint finish after using a Clay Bar to protect and seal the vehicle surface.
- You can store any unused Clay Bar in a plastic zip lock baggie. To prevent it from drying out, spray with Mist & Shine before putting in the baggie. Seal the baggie tightly.
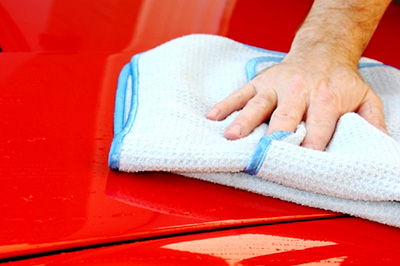
Compound & Polish
When your paint finish on your vehicle requires more than what a Clay Bar or Wax can provide in removing surface defects and improving the overall finish, Compound and Polish are the next step. You can apply both Compound and Polish by hand, but a machine application will cut down on the time required, and do a better overall job compared to hand application. Before starting this project, information is provided below on the basics of Compounding and Polishing.
Machine Polishers
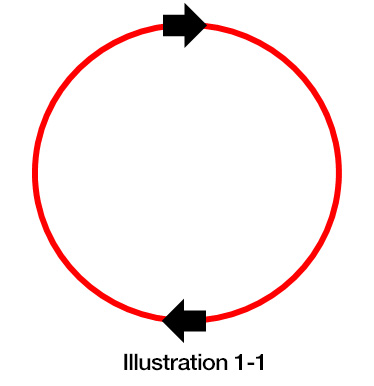
Many people have never used a machine to apply Compound, Polish, Wax or Sealant. Using a machine for application is not difficult, but you should understand the different options available to you before purchasing a machine. Machine polishers are available in both electric and pneumatic (compressed air). The two primary types of machine polishers are Rotary Polishers and Orbital Polishers. The Rotary Polishers spin only in one direction – a circle (see Illustration 1-1). Traveling only in a circle at high speeds creates a lot of heat on the paint finish, and you have to be careful not to overheat/burn the paint finish (or edges). A Rotary Polisher is the most effective tool at helping you correct and eliminate paint finish imperfections, but you must use them with a little more caution than a Dual Action Polisher.
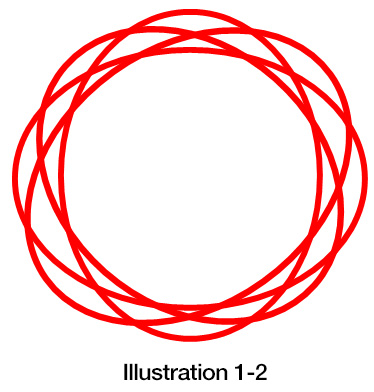
A Dual Action Polisher (also called a DA Polisher and Random Orbital Polisher) oscillates when it spins (see Illustration 1-2). This random oscillating pattern minimizes heat buildup and can be safer to use on your paint finish compared to a Rotary Polisher. Although not quite as effective as a Rotary Polisher with heavy duty polishing tasks, a Dual Action Polisher is great at quickly applying wax and polish, removing minor surface defects, and improving the gloss and shine of your overall paint finish.
Polishing Pads
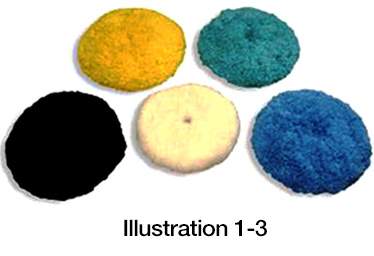
Polishing pads basically fall into two categories – Wool Pads (Image 1-3) and Foam Pads (Image 1-4). Wool Pads and Foam Pads both have several variations to consider such as:
- Cutting Ability: coarse to fine – represented by different colors.
- Polishing Pad Size: 3 inch, 4 inch, 6 inch, etc.
- Backing Plate: Screw On or Velcro
Our goal is to keep things simple by offering a minimal amount of options that can still get the job done.
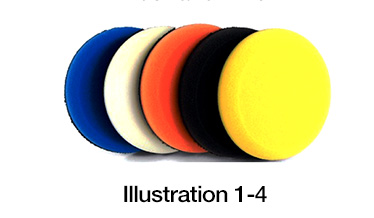
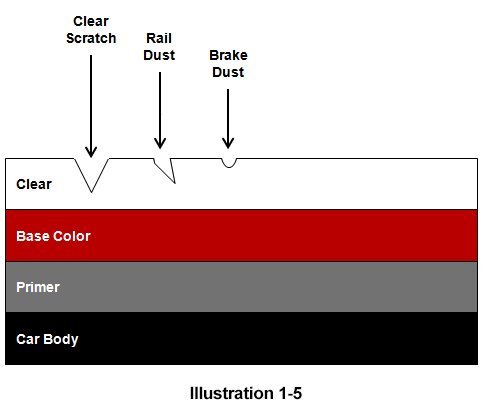
A Wool Pad cuts quicker than a Foam Pad. If you are wet sanding the paint finish with medium to fine grit sandpaper to remove surface defects such as scratches, deposits and etchings that have penetrated the paint finish (see Illustration 1-5), a Wool Pad with Rubbing Compound will remove the defects and the sanding scratches faster than using a Foam Pad.
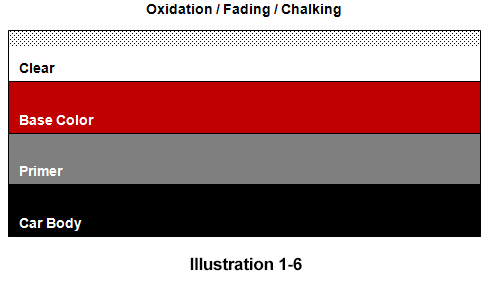
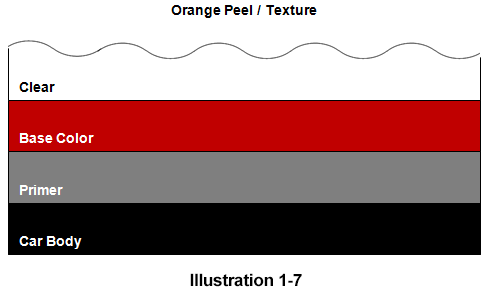
A Foam Pad works great for finishing work and removal of minor paint defects. Polishing and compounding typically requires multiple steps to remove defects and refine scratches to the point where they are eliminated from the surface. You may end up starting with a Wool Pad and Rubbing Compound, and then finishing with a Foam Pad and Polishing Compound. For removal of minor surface defects such as chalked or faded paint (Illustration 1-6), orange peel (Illustration 1-7), swirl marks, minor scratches, and paint with low gloss, a Foam Pad with Polishing Compound works well.
Helpful Tip: Most factory vehicles come with “orange peel” or texture in the paint finish (Illustration 1-7). Orange peel, depending on the severity, can have an impact on the reflection and perceived gloss of your paint vehicle. Orange peel can be minimized by wet sanding and polishing, but when you wet sand you are reducing the thickness of the clear on the vehicle. Be very careful about minimizing the layer of clear on your vehicle. Clear protects your color underneath, and helps absorb the debris that hits your paint finish when your driving.
Backing Plates
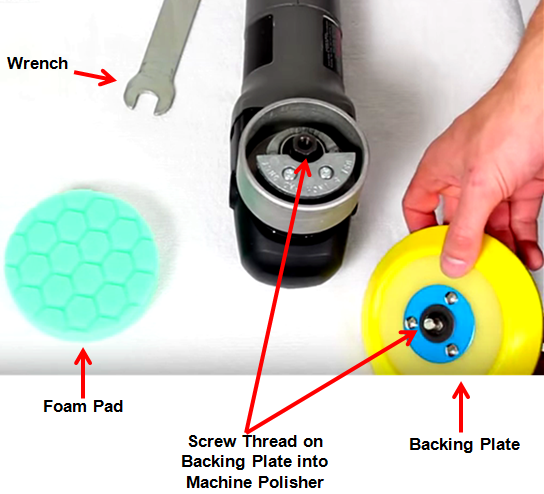
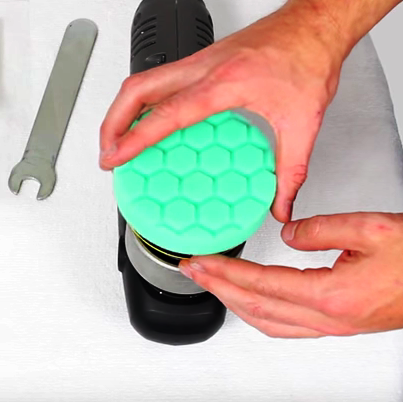
The Backing Plate connects the polishing pad to the machine, and provides support for the polishing pad when polishing the vehicle. Changing the Backing Plate is very simple (pictured right). If you want to polish a smaller area and want a smaller polishing pad, downsizing is fairly easy, but you must match the size of the Backing Plate to the size of the polishing pad.
The size of your polishing pad – Wool Pad or Foam Pad – will depend on the size of your Backing Plate. If you have a 3 Inch Backing Plate than you need a 3 Inch pad. If you have a 6 Inch Backing Plate then you need a 6 Inch pad.You want the pad to cover the Backing Plate completely so that the Backing Pad never touches the vehicle. Polishing pads attach to the Backing Plate with velcro.
Polishes
Vehicle polishes range from very aggressive with a high degree of abrasiveness and cutting ability, to very mild with a low degree of abrasiveness and cutting ability. When polishing, you will likely progress from a Rubbing Compound to a Finishing Compound, working in stages. Although polishes come packaged with a variety of different names, they generally fall into four groups:
- Rubbing Compound (very abrasive, can usually remove 600 grit scratches, must be followed with a milder abrasive polish).
- Cutting Compound (abrasive, can remove 1200 grit scratches, should be followed up with Polishing Compound).
- Polishing Compound (mildly abrasive, can remove 1500 grit scratches, should be followed up with Swirl Remover or Glaze).
- Finishing Compound (very little abrasive, fills swirl marks and very light scratches, should be followed up with a Wax or Sealant).
Helpful Tip: Always start with the least abrasive pad and compound. You can always switch to something more aggressive / abrasive if it is not doing the job.
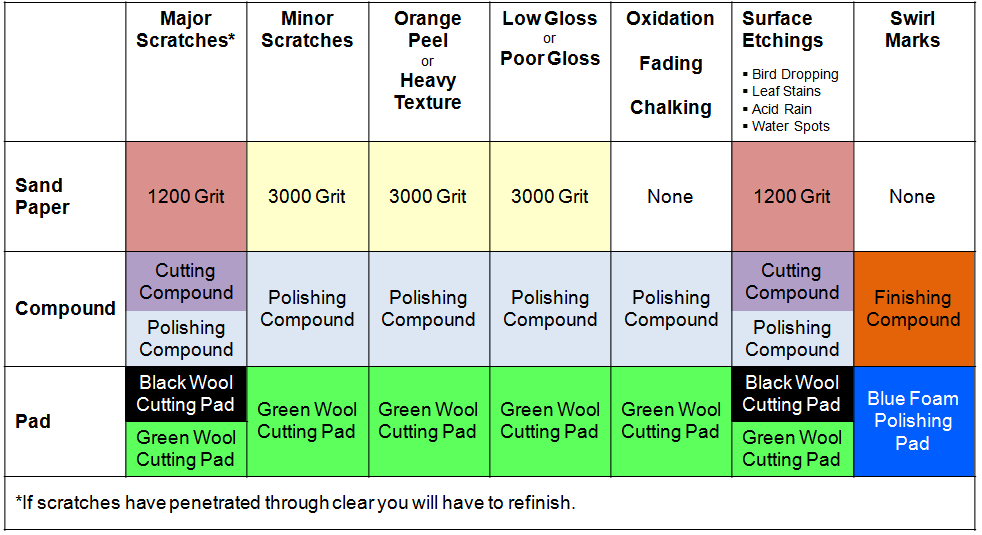
Chart 1-1 below summarizes the recommended sandpaper grit, compound, and pad to use based on the condition you are trying to correct.
Step 1 – Apply Compound to Vehicle Surface
- After you have washed and dried your vehicle thoroughly to remove as much of the dirt, grime, and other contaminants from the surface as possible, you are ready to Compound and Polish.
- Depending on the condition of your paint finish (see Chart 1-1 above) apply Rubbing Compound, Cutting Compound, or Polishing Compound to the surface of your vehicle.
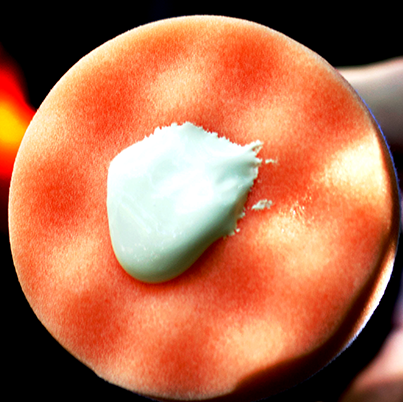
- Apply only a small amount of compound (an amount equal to the size of a quarter).
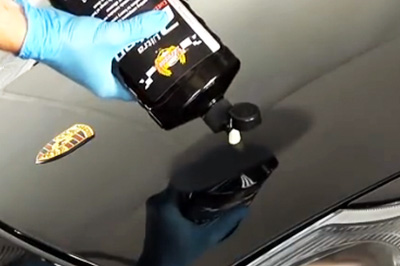
Step 2 – Spread Compound with Pad
- Only work about a 2 foot by 2 foot area at one time.
- Depending on the condition of your paint finish (see Chart 1-1 above) and your choice of Compound or Polish, attach a Compounding Pad, Cutting Pad, or Polishing Pad to your machine.
- Spread the Compound or Polish around with your pad before you start polishing.
Helpful Tip: If your pad is dry, lubricate it first by spraying it with Mist N Shine or another type of quick detail spray (this is also called “seasoning the pad”). Not only will this help lubricate the pad (which minimizes scratch creation of a dry pad spinning on the paint finish) it also helps minimize soak in of your Compound or Polish.
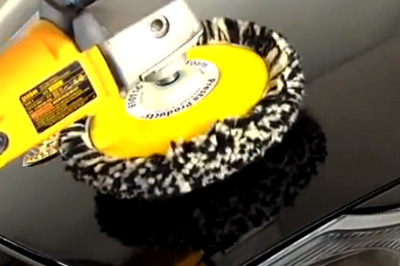
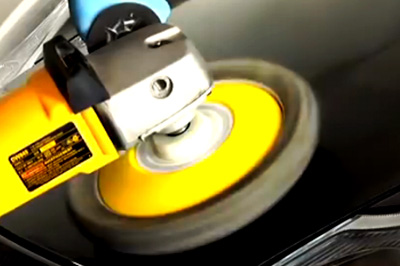
Step 3 – Start Compounding / Polishing
- Hold the machine and pad flat against the surface.
- Work back and forth using light to medium pressure.
- Keep the rotation on the pad around 1400 to 2000 RPM (you can set the RPM with a dial on some machines).
- Always keep enough polish on the surface and the pad. Never buff on a dry surface.
Helpful Tip: To prevent catching the pad on an emblem, plastic trim or edge, it may be helpful to Tape of edges, plastic trim, emblems or anything else that you could catch the pad with while buffing.
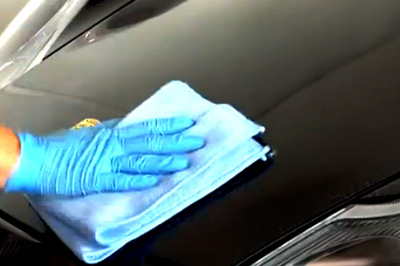
Step 4 – Use a Micro Fiber Cloth to Clean Surface
- After Compounding / Polishing, wipe the area with a Micro Fiber towel to remove any Compound / Polish residue.
Step 5 – Change to a Finishing Compound and Polishing Pad
- Change to a Finishing Compound and Polishing Pad to finish buffing the vehicle surface to a high gloss.
Step 6 – Apply Finishing Compound
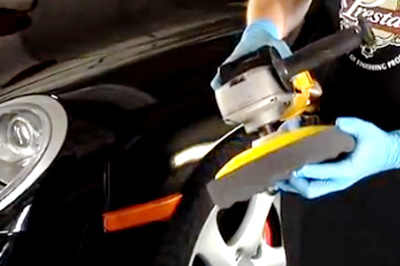
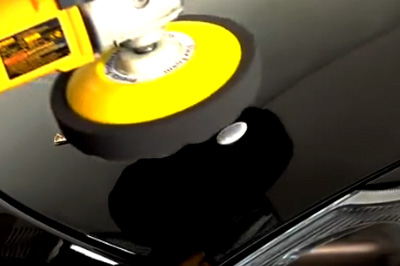
- Apply Finishing Compound to the surface and spread with Polishing Pad.
- Start polishing a 2 foot by 2 foot area at a time.
- Moving back and forth, keep the Polishing Pad flat on the surface at about 2000 RPM.
- Polish surface to a high gloss.
Helpful Tip: You can keep your Foam Pad or Wool Pad clean while polishing with a Pad Cleaning Tool and Spray Bottle with water.
Step 7 – Use a Micro Fiber Cloth to Finish Clean Surface
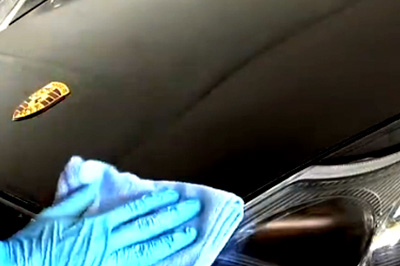
- After Polishing, wipe the area with a Micro Fiber towel to remove any Polish residue and finish polishing surface by hand to a high gloss.
Paint Sealant / Wax
After you have finished washing – using a clay bar – compounding and polishing – protect the surface of your vehicle with a Car Wax or Paint Sealant. A Car Wax can be made from natural sources such as carnauba, or synthetic sources such as polymers and acrylic resins. Most synthetic waxes are available in a liquid form, while carnauba wax generally will be found as a paste but is also available as a liquid wax. Carnauba wax has outstanding depth and shine.
Paint Sealant is completely synthetic. Because it is synthetic, it lasts longer than natural waxes like carnauba. Paint Sealant is designed to replicate the look of a carnauba wax, but it offers longer lasting protection. Some Paint Sealants offered at Dealerships come with a protection warranty, but they must be applied by a trained technician.
Step 1 – Apply Wax or Paint Sealant by Hand
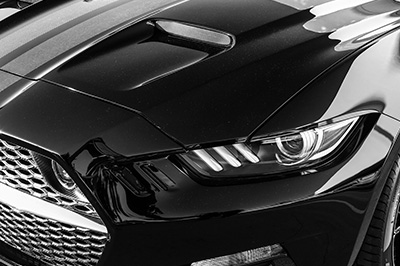
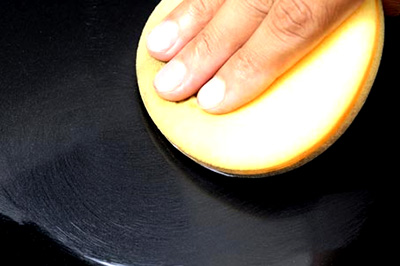
- Apply the Car Wax (liquid or paste) or Paint Sealant with a Foam Applicator by hand to the vehicle surface.
- Apply the Car Wax (liquid or paste) or Paint Sealant in thin to medium coats. Applying heavy coats makes the Car Wax (liquid or paste) or Paint Sealant more difficult to remove, and will not help improve the shine.
- Use circular motions, starting from the front to the hood, working to the sides, and then to the back of the car.
- Try to cover small areas at a time and avoid windows, door jambs, emblems and plastic trim.
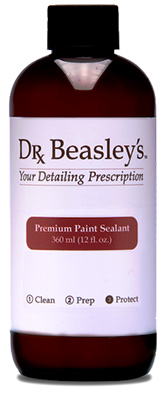
Helpful Tip: For premium paint protection, use Dr. Beasley’s Premium Paint Sealant. - Traditional carnauba waxes don’t last very long and regular paint sealants leave behind a flat gloss with minimal depth or warmth.
- Dr. Beasley combines the best of both protection and shine.
- The unique synthetic polymer structure will protect the paint finish for up to a year while leaving behind an extraordinary shine unmatched by other synthetic sealants.
- Easy application and removal
Treat your car to the best Gloss & Paint Protection.
Helpful Tip: For premium paint protection, use Dr. Beasley’s Premium Paint Sealant.
- Traditional carnauba waxes don’t last very long and regular paint sealants leave behind a flat gloss with minimal depth or warmth.
- Dr. Beasley combines the best of both protection and shine.
- The unique synthetic polymer structure will protect the paint finish for up to a year while leaving behind an extraordinary shine unmatched by other synthetic sealants.
- Easy application and removal
Treat your car to the best Gloss & Paint Protection.
Step 2 – Apply Wax or Paint Sealant by Machine
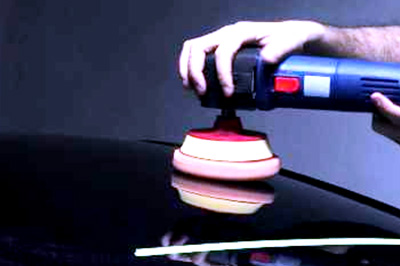
- As an option to hand application, you can apply the Car Wax (liquid or paste) or Paint Sealant with a Foam Polishing Pad and Machine Polisher.
- If you are using a paste wax, spread the wax onto the Foam Polishing Pad.
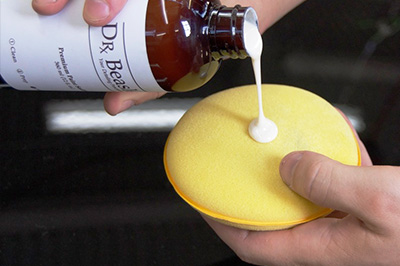
- If you are using a liquid wax or Paint Sealant, dispense several quarter size drops onto the edge of the pad.
- With the Machine Polisher off, use the Foam Polishing Pad on the machine to spread the wax or sealant over the surface before turning the machine on. This will minimize potential splatter of the liquid.
- Use the Machine Polisher to buff the Car Wax (liquid or paste) or Paint Sealant into the finish.
Step 3 – Wipe Surface
- Using circular motions, wipe off the Car Wax or Paint Sealant with a quality Micro Fiber
- Buff the haze away to a stunning shine as you remove the Car Wax or Paint Sealant
- It is generally recommended that you re-wax your vehicle every 3 months. With Paint Sealant, every 6 months.
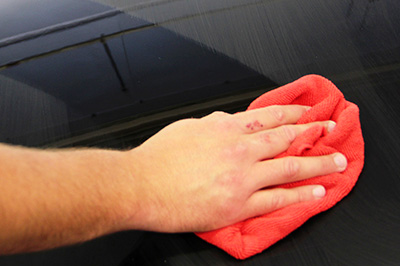
2. Interior Detail
Cleaning Your Interior Cockpit
After you have finished washing – using a clay bar – compounding and polishing – protect the surface of your vehicle with a Car Wax or Paint Sealant. A Car Wax can be made from natural sources such as carnauba, or synthetic sources such as polymers and acrylic resins. Most synthetic waxes are available in a liquid form, while carnauba wax generally will be found as a paste but is also available as a liquid wax. Carnauba wax has outstanding depth and shine.
Paint Sealant is completely synthetic. Because it is synthetic, it lasts longer than natural waxes like carnauba. Paint Sealant is designed to replicate the look of a carnauba wax, but it offers longer lasting protection. Some Paint Sealants offered at Dealerships come with a protection warranty, but they must be applied by a trained technician.
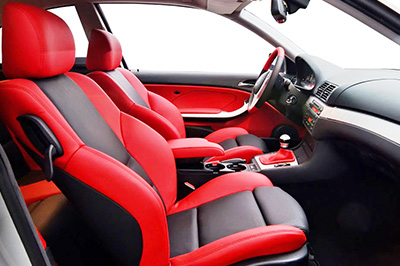
Step 1 – Vacuum
- Remove all loose items from the interior floor, seats, dash, console, trays, etc. Throw wrappers and trash in the garbage.
- Remove floor mats, seat covers, and ashtrays.
- If you have access to compressed air, blow out the dust and dirt that may have accumulated in the rear window, dash, front window, vents, and floors.
- Remove loose pet hair with a Pet Hair Brush.
- Vacuum carpets, seats, console, trays, recesses in doors, and dash. Make sure you move seats all the way up (then vacuum) and all the back (then vacuum).
Helpful Tip: Use a Carpet Brush to loosen up dirt and make it easier to vacuum loosened dirt away.
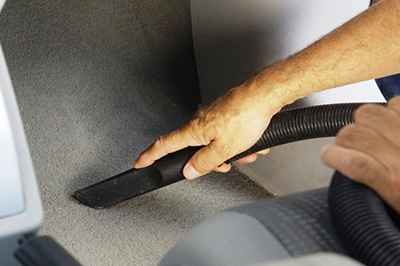
Step 2 – Clean Carpet and Remove Stains
- There are generally two choices when cleaning carpets and removing stains: Carpet & Upholstery Cleaner and/or Steam Cleaning.
- Carpet & Upholstery Cleaner can be sprayed on the carpet and/or stain, scrubbed with a Carpet Brush, dried with a clean towel, and then vacuumed.
- For Steam Cleaning, The Little Green Portable Carpet Cleaner from Bissell is a relatively inexpensive product to use for steam cleaning carpet. You will have to pre treat stains with Spot and Stain formula before Steam Cleaning.
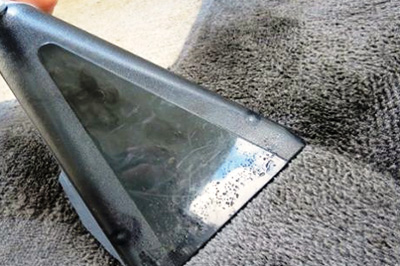
Step 3 – Clean Fabric/Cloth Seats and Remove Stains
- There are generally two choices when cleaning cloth/fabric seats and upholstery: Carpet & Upholstery Cleaner and/or Steam Cleaning.
- Carpet & Upholstery Cleaner can be sprayed on the cloth/fabric seats and/or stain, scrubbed with a Carpet Brush, dried with a clean towel, and then vacuumed.
- For Steam Cleaning, The Little Green Portable Carpet Cleaner from Bissell is a relatively inexpensive product to use for steam cleaning cloth/fabric seats and upholstery. You will have to pre treat stains with Spot and Stain formula before Steam Cleaning.
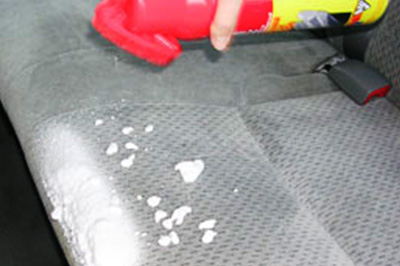
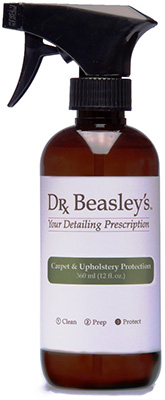
Helpful Tip: Use Carpet & Upholstery Protection on new fabric/cloth seats to protect them from stains.
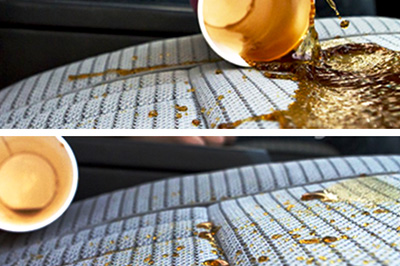
- Formulated to protect the individual fibers in your vehicle’s fabric surfaces, Carpet & Upholstery Protection will bead liquids right off the surface, preventing stains.
- This product protects without affecting the look and feel of the fabric surface, making it the perfect addition to any cleaning process.
- For use on carpets, upholstery, convertible tops, and any other fabric surfaces.
- Protects from dirt and other contaminants making surface easier to clean.
Step 4 – Clean Leather and Vinyl Surfaces
- Cleaning leather (seats and other surfaces) is a two step process.
- First, use Leather Prep to remove built up oils, grime and unsightly stains.
- Second, use Leather Sealer to nourish and seal the leather surface with polymer technology to keep your leather looking its finest.
- Use warm water and a warm wet soapy towel to clean vinyl surfaces. If you have stubborn stains, dirt or grime, use Heavy Duty Vinyl & Rubber Cleaner.
See also Leather and Vinyl Refinishing if your leather or vinyl seats or surfaces need to be refinished.
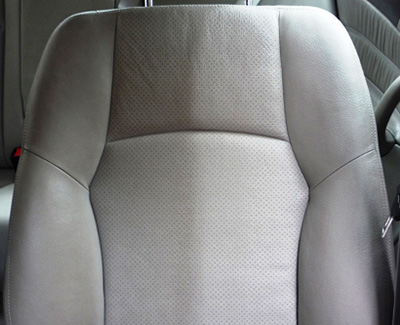
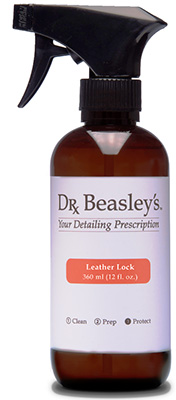
Helpful Tip: Use Leather Lock on new Leather seats and surfaces to protect them from dirt and stains.
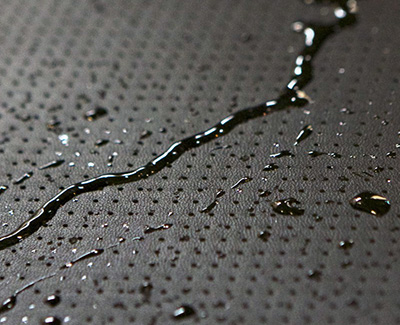
- Leather Lock is a hydrophobic coating which repels liquids, oil, alcohol, soil and prevents staining.
- This polymer based coating is safe and effective on all top coated leathers, making it perfect for your seats, dash, door panels, and virtually all other automotive leather surfaces.
- When combined with a good leather conditioner you will be able to keep your leather looking pristine for years to come.
- Safe for all top-coated leather
Step 5 – Clean the Center Console & Glove Box
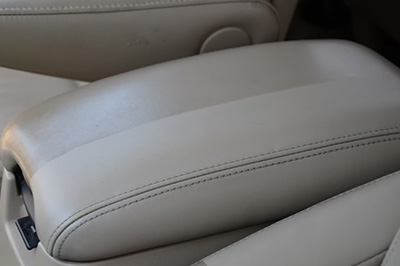
- If cleaning the outside of a leather console, first, use Leather Prep to remove built up oils, grime and unsightly stains, and then use Leather Sealer to nourish and seal the leather surface with polymer technology to keep your leather looking its finest.
- For cleaning vinyl and plastic surfaces use warm water and a warm wet soapy towel. If you have stubborn stains, dirt or grime, use Heavy Duty Vinyl & Rubber Cleaner.
- Clean the inside and outside of the glove box with Heavy Duty Vinyl & Rubber Cleaner.
- Use Tire & Vinyl Shine to protect interior surfaces (plastic, leather, vinyl).
Step 6 – Clean the Dashboard and Instrument Panel
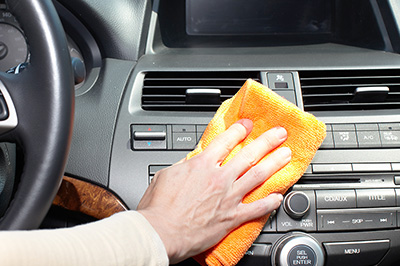
- Use a Dash Duster to remove the dust from the dashboard area..
- Spray Glass Cleaner on glass, clear plastic, interior plastic and vinyl surfaces to clean and remove any dirt or grime.
- Use a Detail Brush to scrub the small cracks and crevices.
- Wipe dry with a clean Micro Fiber towel.
- Use Tire & Vinyl Shine to protect interior surfaces (plastic, leather, vinyl).
Step 7 – Clean Vents
- The air vents in your vehicle trap a lot of dust and allergens and should be thoroughly cleaned.
- Use a Vent and Dash Brush to collect the trapped brush along with a vacuum to lift away the dust and allergens trapped in your vents.
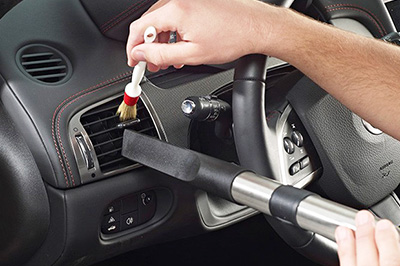
Step 8 – Door Panels
- Vacuum out all door panel recessed areas with a vacuum with a small attachment.
- If door panel is cloth or fabric, use Carpet & Upholstery Cleaner to clean.
- Remove marks or smudges on the door with Heavy Duty Vinyl & Rubber Cleaner.
- Use Tire & Vinyl Shine to protect the door panel surface (plastic, leather, vinyl).
See also Leather and Vinyl Refinishing if your door panel surfaces need to be refinished.
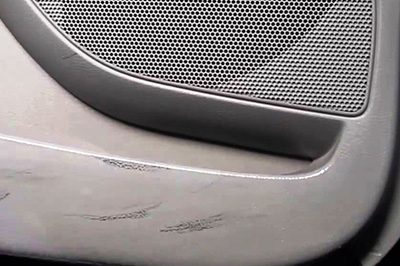
Step 9 – Floor Mats
- Remove mats from vehicle.
- Vacuum carpet mats to remove any dirt or debris.
- If your carpet mats have stains, spray stains with Carpet & Upholstery Cleaner and scrub with a Carpet Brush.
- You can also steam clean carpet mats to deep clean and brighten them.
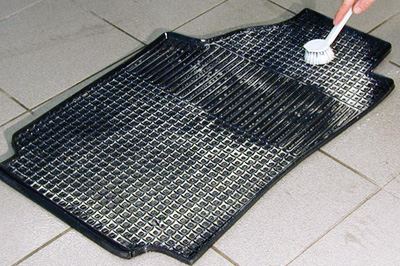
- To clean rubber or plastic mats, remove them from the car and use a water hose and spray nozzle to rinse mats.
- Use a Carpet Brush and soapy water to scrub the mats clean, and then rinse off all soap with clean water.
- Let mats dry before placing back into vehicle.
See also Leather and Vinyl Refinishing for refinishing your rubber floor mats, or Fabric Refinishing to refinish your carpet floor mats.
Step 10 – Remove Odors
- To eliminate odors from your vehicle, try using baking soda first to absorb odors. Sprinkle baking soda on the carpet or cloth seat where the odor is emanating. Let baking soda sit, and then vacuum it up.
- Replacing the cabin filter in your vehicle may also reduce odors. A cabin air filter is recommended to be replaced every 12 months. Clogged cabin air filters lead to reduced air flow and potentially bad odors coming from the air vents.
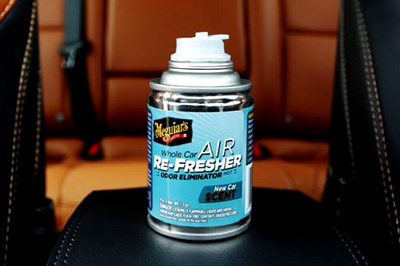
- You can also purchase Whole Car Air Re-Fresher to penetrate the complete interior of your car eliminating unwanted odors.
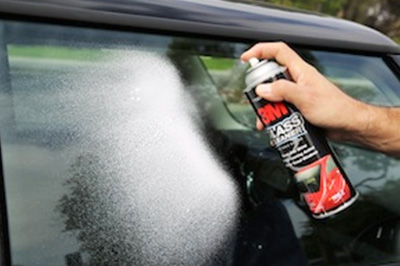
Step 11 – Clean Glass
- Use Glass Cleaner specifically designed for automotive glass, and also designed to not harm window tints, to clean the glass surfaces on your vehicle.
- Shake well before using.
- Spray a liberal amount of Glass Cleaner onto the surface, holding the can 8-12 inches from the surface.
- Wipe the Glass Cleaner immediately with a clean Micro Fiber Cloth.
- Avoid cleaning glass in very warm or hot temperatures to minimize streaking.
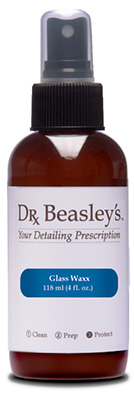
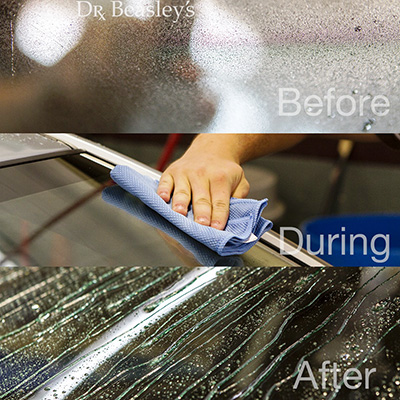
Step 12 – Wax Glass to Enhance Vision and Repel Water
- Use Glass Waxx to polish and seal your windshield so water and snow bead right off even in the roughest weather conditions.
- Never worry about obscured vision on the road again – Glass Waxx provides incredible high definition visibility
Please be Advised
The recommendations and process steps listed in the projects below are general do-it-yourself recommendations that are designed to produce a successful project. Due to the many variables involved with each project and process steps, Touch Up Zone cannot guarantee results and does not accept liability for incorrect product application or use.
Before you Start
- Always wear proper safety protection: Safety Glasses, Respirator, Particle Mask, Latex or Nitrile Gloves and Hearing Protection (if you are using power tools that emit high noise levels).
- Utilize a well ventilated area when spraying coatings or sanding.
- Make sure the temperature is warm enough to allow coatings and materials to dry properly.
- Work in a well lighted area where you can clearly see what you are doing.
- Always follow label instructions on products.
Tools, Equipment, Paint and Material Options
The Tools, Equipment, Paint and Materials recommended for the each project are listed in the repair procedure and are highlighted in Red. You can purchase the Tools, Equipment, Paint and Materials for these products by clicking on the button below. For product definitions and general tech tips click here.


