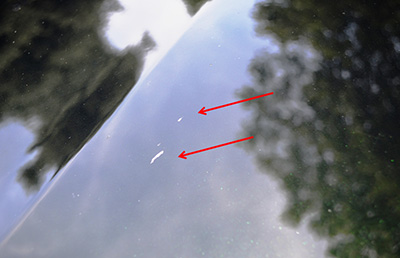
If you drive your vehicle on a regular basis, it’s almost inevitable that your paint work will get blemished in some way. What’s more important is what you can do about it when it happens.
There are a number of different techniques and methods to repair chips and nicks in your vehicle. The repair process, tools and materials required for each of the methods or projects below are clearly identified. The amount of time and effort really depends on how you want to repair the type of chip or nick that you have. Repair procedures generally fall into two categories:

Click Below for Step-by-Step Instructions – Two Methods for Chip & Nick Repair
Chip and Nick Repair Method One: Touch Up Paint Pen
Step 2 – Prepare to use the Base Color Pen
- Remove the cap from the Base Color Pen.
- Shake the pen until you hear the agitator ball rattling inside.
- On a separate piece of cardboard or other firm surface (other than the vehicle), press down lightly to get the Base Color
- Once you see color flowing from the pen tip you are ready to apply the Base Color to the chips and nicks
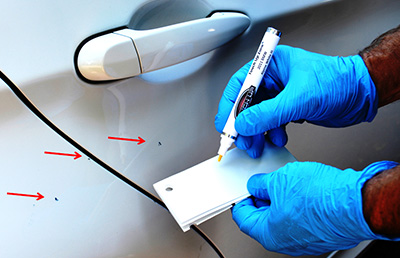
Step 3 – Apply Base Color
- With a steady hand, lightly press down on the pen to apply Base Color to the chip or nick.
- Only apply enough color to hide the chip.
- The Base Color will dry flat with no gloss. You will add gloss – and additional filling – when you apply the Clear over the Base Color.
- Allow Base Color to dry about 5 to 10 minutes (@70° F).
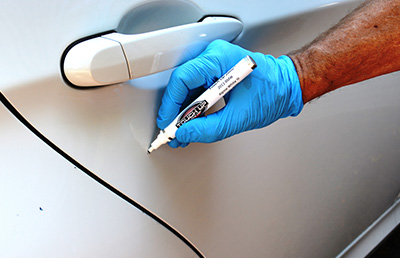
Step 4 – Apply Clear
- With a steady hand, lightly press down on the pen to apply Clear over the Base Color.
- Allow Clear to dry about 5 to 10 minutes (@70° F).

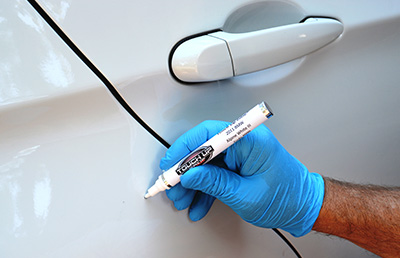
Step 5 – Remove Excess Clear (If Necessary)
- If you are happy with your results, stop here!
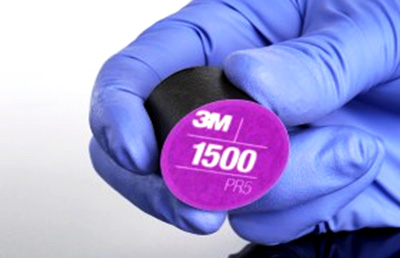
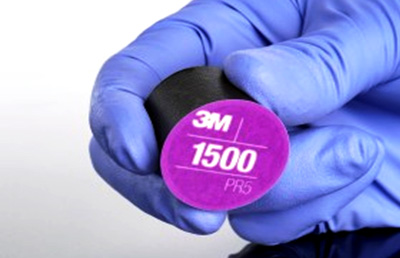
- If you feel there is excess Clear on the surface, allow Clear to dry overnight and then wet sand / level the surface with very fine 1500 Grit Wetordry Sand Paper and water, or wet sand with a Hand Sanding Cylinder and 1500 Grit Wetordry Sanding Circle (pictured right). This micro nibber / sander works great for very precise sanding work.
- After sanding flat, use Rubbing Compound and Polishing Compound to buff to a glossy shine.
Step 6 – Let Base Color and Clear Dry Overnight
- Once you are satisfied with the chip repair, let the Base Color and Clear dry overnight.
- The Base Color and Clear touch up are designed to fill and hide chips and nicks in your vehicles surface. The repair will most likely not be completely invisible from very close up, but you should not be able to detect the repair from normal viewing distance.
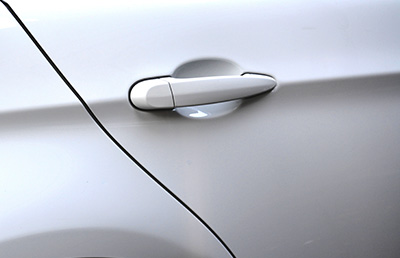
Chip and Nick Repair Method Two: Touch Up Bottle and Brush
The first step in repairing chips and nicks is to understand the extent of the damage. If the chip has penetrated down to bare metal (Illustration 1-1) you will have to take additional steps to repair. This includes using Wax & Grease Remover to clean any wax or dirt from the chip and a Prep Pen to remove any possible rust or scale from the bare metal. If the chip has penetrated to bare metal, you will also have to apply a Primer to the bare metal to prevent future corrosion, and to create a surface that the Base Color and Clear can adhere to.
If the chip has not penetrated down to bare metal, you can repair with just Base Color and Clear.

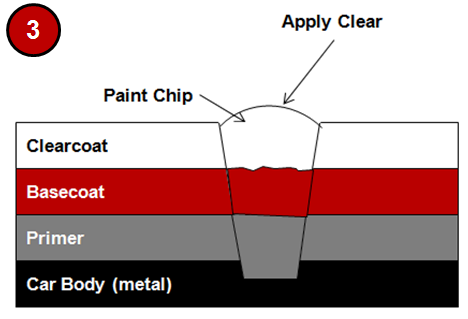
Step 2 – Apply Base Color to Chip
- Shake the Base Color Bottle (pictured below right) until you hear the agitator ball rattling inside.
- Remove the cap from the Base Color Bottle.
- You can use the Touch Up Brush that comes with the bottle, or use a finer Micro Brush or Dabber (pictured below) to apply the Base Color to the chip.
- Only apply enough color to hide the chip (see Illustration 1-2 below).
- The Base Color will dry flat with no gloss. You will add gloss – and additional filling – when you apply the Clear over the Base Color.
- Allow Base Color to dry about 5 to 10 minutes (@70° F).

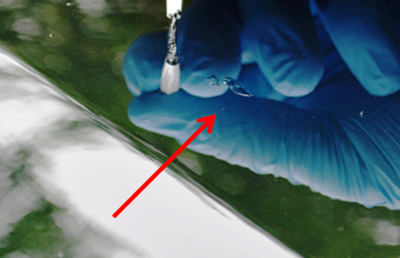
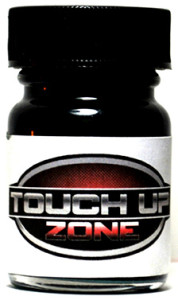
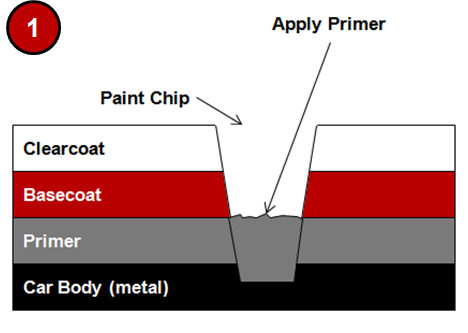
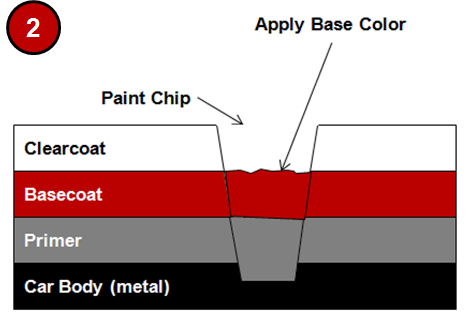
Step 3 – Apply Clear to Base Color
- Remove the cap from the Clear Bottle.
- You can use the Touch Up Brush that comes with the bottle, or use a finer Micro Brush or Dabber to apply Clear over the Base Color.
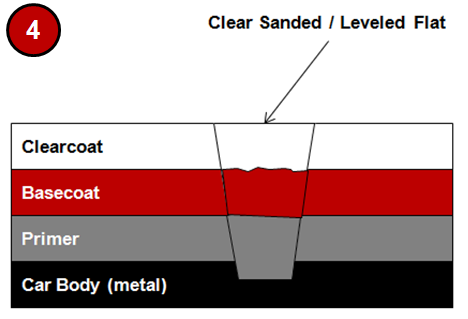
- Once applied, if you feel there is excess Clear on the surface, allow Clear to dry overnight and then wet sand / level the surface (see Illustration 1-2 above) with very fine 1500 Grit Wetordry Sand Paper and water, or wet sand with a Hand Sanding Cylinder and 1500 Grit Wetordry Sanding Circle (pictured right). This micro nibber / sander works great for very precise sanding work.
- After sanding flat, use Rubbing Compound and Polishing Compound to buff to a glossy shine.
Step 4 – Let Base Color and Clear Dry Overnight
- Once you are satisfied with the chip repair, let the Base Color and Clear dry overnight.
- The Base Color and Clear touch up is designed to fill and hide chips and nicks in your vehicles surface. The repair will most likely not be completely invisible from very close up, but you should not be able to detect the repair from normal viewing distance.
Please be Advised
The recommendations and process steps listed in the projects below are general do-it-yourself recommendations that are designed to produce a successful project. Due to the many variables involved with each project and process steps, Touch Up Zone cannot guarantee results and does not accept liability for incorrect product application or use.
Before you Start
- Always wear proper safety protection: Safety Glasses, Respirator, Particle Mask, Latex or Nitrile Gloves and Hearing Protection (if you are using power tools that emit high noise levels).
- Utilize a well ventilated area when spraying coatings or sanding.
- Make sure the temperature is warm enough to allow coatings and materials to dry properly.
- Work in a well lighted area where you can clearly see what you are doing.
- Always follow label instructions on products.
Tools, Equipment, Paint and Material Options
The Tools, Equipment, Paint and Materials recommended for the each project are listed in the repair procedure and are highlighted in Red. You can purchase the Tools, Equipment, Paint and Materials for these products by clicking on the button below. For product definitions and general tech tips click here.

