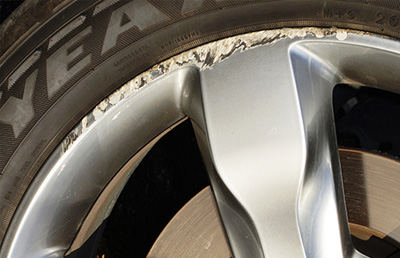
The wheel refinishing projects detailed below will help you to repair damage to your wheels / rims caused by scraping up against curbs (curb rash), refinish rims that look old, corroded or discolored, or to customize the look of your rims.
The products and procedures outlined below are designed to help you repair and enhance your vehicle inexpensively yourself with great results.
Wheel refinishing projects fall into the following categories:
Click Below for Step-by-Step Instructions – Wheel Refinishing
Repairing Curb Rash, Scrapes, Scratches and Discoloration on Painted Alloy Wheels
Refinishing your wheels (rims) can be performed with the wheel on the vehicle, or with the wheel removed from the vehicle. If you leave the wheel on the vehicle you will need to mask off the lug nuts, air valve, and behind the wheel to avoid getting overspray on the brake caliper and rotor.
Removing the wheel is recommended because it allows you to comfortably work from a raised surface such as a work table or bench, avoids having to mask the brake caliper and rotor, and allows you to spray onto a flat surface versus a vertical surface (minimizing the risk of runs or sags). The following procedures are illustrated with the wheel removed.
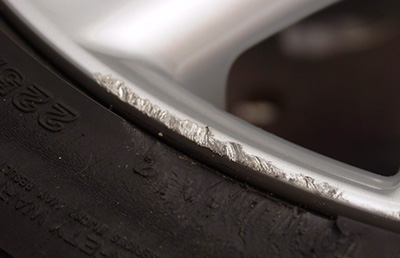
Step 2 – Clean and Scuff Surface Thoroughly
- It is recommended to use both soap and water and prep solvent to thoroughly clean the wheel.
- Wash the wheel with soap and water and dry the wheel with a clean towel or compressed air and blow gun.
- Spray or Wipe the entire wheel with Wax and Grease Remover and wipe dry with a clean Disposable Wipe. This eliminates any built-up wax, grease, silicone, road tar, etc., that could cause paint failure.
- Failure to remove contaminants may result in “fish eyes” or carters in the new paint that you apply. This is caused by the paint not properly adhering to the surface due to silicone or other contaminants that were not removed.
Helpful Tip: You can use a scuff pad in concert with the Wax and Grease Remover to clean and scuff sand the wheel at the same time. If you are planning to use Primer over the entire wheel then use a Red Scuff Pad. If not, then use a Gray Scuff Pad (the Gray Scuff Pad is not as abrasive as the Red Scuff Pad). Saturate the scuff pad with Wax and Grease Remover and scuff sand the wheel. This will not only help clean the wheel better, it will also create adhesion of Primer or Color by scuff sanding.
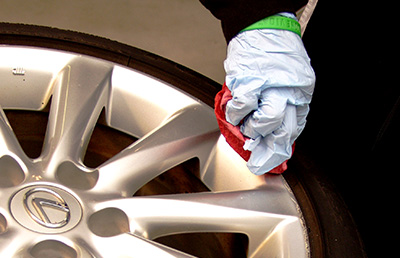
Step 3 – Sand the Damaged Area (Curb Rash)
- Once wheel is completely dry, you will need to flatten and smooth any damaged areas of the wheel – curb rash, dents, nicks, and gouges.
- Use 80 Grit Production Sandpaper to carefully sand down the damaged area(s) of the wheel.
- Try to contain the area of sanding with 80 Grit Production Sandpaper to just the damaged area of the wheel (you may want to Tape off the surrounding area to minimize unwanted sand scratches in unaffected areas).
- Make sure the area is sanded smooth and flat, and you have removed any jagged edges, or raised areas of the alloy wheel.
- Once sanded flat, use 150 Grit Production Sandpaper to smooth out the 80 Grit Production Sandpaper sanding scratches.
Helpful Tip: Use a Rubber Sanding Block along with sandpaper to help flatten the damaged area of the alloy (aluminum) wheel.
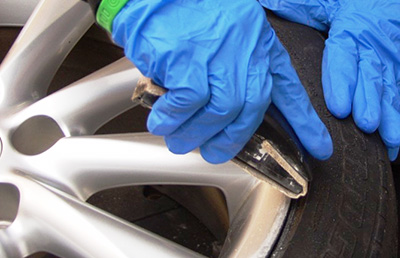
Alternative Sanding Method
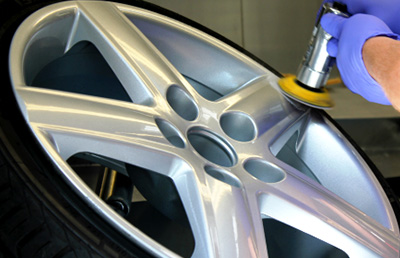
- As an alternative to hand sanding, you can use either an air supplied 3 Inch DA Sander or an electric Drill with a 3 Inch Sandpaper Attachment.
- Use a 3 Inch 80 Grit Sandpaper Disc to carefully sand down the damaged area(s) of the wheel flat to completely remove jagged areas or raised areas of the wheel.
- Once sanded flat, use a 3 Inch 150 Grit Sandpaper Disc to smooth out the 3 Inch 80 Grit Sandpaper Disc sanding scratches.
Helpful Tip: Use a Rubber Sanding Block along with sandpaper to help flatten the damaged area of the alloy (aluminum) wheel.
Step 4 – Mask Tire
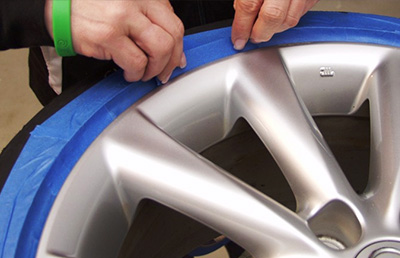
• Use Tape to mask the tire and the surrounding area.
Helpful Tip: Tape will not stick to a tire that has a tire dressing / tire shine product (silicone) sprayed on it. Wipe the tire with Wax and Grease Remover and dry with a clean paper towel to help increase adhesion of the Tape to the tire.
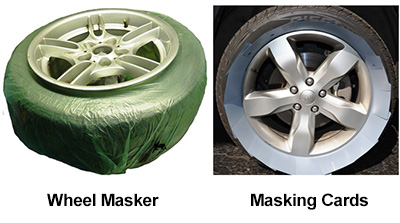
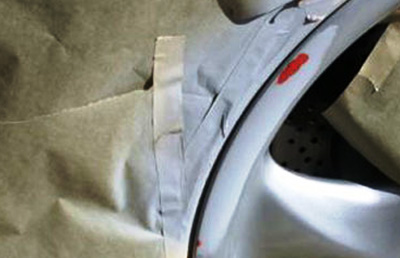
Helpful Tip: As an alternative masking method, you can use either a Wheel Masker (pictured right) or Masking Cards (Pictured) to help keep overspray from the wheel off of the tire. With the Wheel Masker the tire is deflated, the Wheel Masker is stretched around the rim (pictured right), and the tire is then turned over and the bag secured on opposite side with Tape. With Masking Cards you simply fit the cards all the way around the rim of the wheel (pictured right).
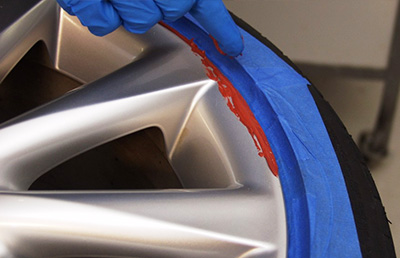
Step 5 – Apply Alloy Wheel Putty to Scratches
- Use Alloy Wheel Putty to fill in any remaining scratches or grooves in the surface of the alloy wheel.
- Carefully apply the Alloy Wheel Putty with a a small Plastic Spreader, or a gloved finger (wearing Nitrile or Latex Gloves).
- Apply Alloy Wheel Putty in thinner coats, allowing each coat to dry before adding more.
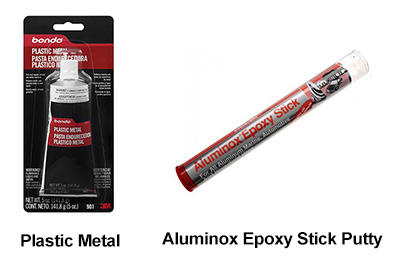
Helpful Tip: Use a Alloy Wheel Putty that is recommended for Alloy Wheels like Aluminox or Plastic Metal (see below). Regular putties do not hold up to wheel vibrations very well.
Step 6 – Sand Putty after Drying
- Allow Alloy Wheel Putty to dry completely before sanding. Dry time will depend on temperature.
- Once putty has dried completely, sand smooth with 220 Grit Production Sandpaper.
- If you are satisfied that scratches and gouges have been filled, final sand the area with 400 Grit Production Sandpaper.
- Scuff sand any remaining unsanded areas, or areas with a glossy finish, with a Gray Scuff Pad.
- Once all course grit sanding scratches have been sanded down with finer 400 Grit Production Sandpaper sanding scratches, you are ready to apply Primer.
Step 7 – Apply Primer
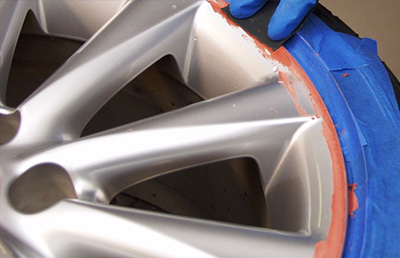
- To promote adhesion and corrosion resistance, it is recommended to apply 1 light to medium coat of Etch Primer over any bare metal before applying Primer.
- After Etch Primer has dried, apply 2 to 3 coats of Primer over the repair area, allowing each coat to flash off before applying the next.
- Once dry, sand with 400 Grit Production Sandpaper.
- Check the repair area for scratches. If any scratches can be detected that the Primer did not fill, use a thin coat of Alloy Wheel Putty to fill. Allow putty to dry. Sand and reapply Primer.
- Once repair area is free of scratches, you can apply a coat or two of Primer to the rest of the wheel if desired.
- Allow Primer to dry completely.
- Finish sand the entire wheel with 800 Grit Production Sandpaper.
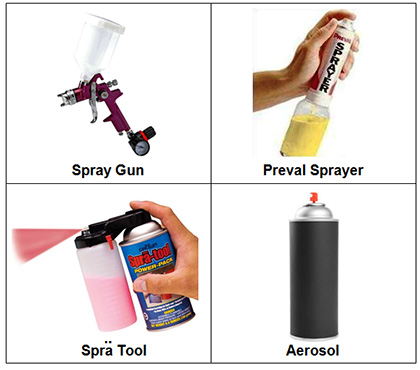
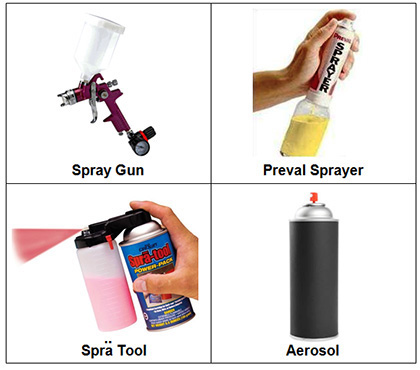
Helpful Tip: There are a number of methods to apply Primer including Spray Gun, Preval Sprayer, Spra Tool or Aerosol. The Spray Gun requires an air compressor. The Preval Sprayer and Spra Tool require the purchase of a pint or quart of coating that can then be added to the spray container. Using an Aerosol is very convenient – nothing to mix or add.
Application Methods
Step 8 – Clean and Re-Mask Wheel
- In an effort to get the cleanest paint refinish results possible, it is suggested that the tire be cleaned and re-masked. The old Tape and Masking Paper or Plastic can sometimes trap dust and debris that could end up in either your Color or Clear when repainting.
- If possible, blow off the wheel and tire with compressed air to loosen up and remove any trapped dirt or debris.
- Wipe or spray Wax and Grease Remover on the wheel to remove any possible contaminants from the painting surface.
- Re-mask the tire using Tape and Masking Paper, Wheel Masker
(pictured right), or Masking Cards. - As a final step prior to painting, use a Tack Cloth to remove any final dust or debris.
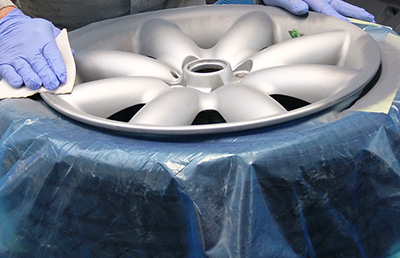
Step 9 – Apply Color and Clear
• Apply 2 to 3 medium wet coats of Color to the wheel, allowing each coat to flash off before applying the next.
• If using a Base Color, you will have to apply Clear once the Base Color has dried.
• Apply 2 to 3 medium wet coats of Clear, allowing each coat to flash off before applying the next.
• Allow Color and/or Clear to dry 24 hours before handling.
Helpful Tip: There are a number of methods to apply Color and Clear including Spray Gun, Preval Sprayer, Spra Tool or Aerosol. The Spray Gun requires an air compressor. The Preval Sprayer and Spra Tool require the purchase of a pint or quart of coating that can then be added to the spray container. Using an Aerosol is very convenient – nothing to mix or add.
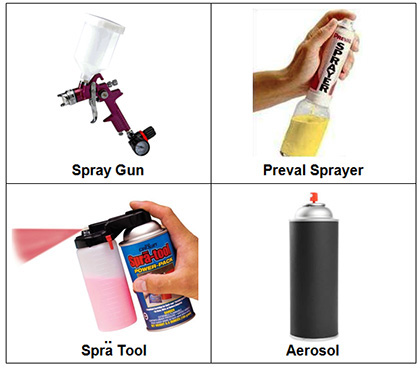
Application Methods
Stripping and Refinishing Wheels
The finish on your wheels will wear down after time and sometimes actually start corroding. Aside from replacing with new wheels the only remedy is refinishing. Refinishing can be accomplished whether your wheel has a chrome plated surface or whether they have a painted surface. As with most painting projects, the results are very dependent on the level of preparation.
When refinishing wheels down to the bare metal surface it is highly recommended to remove the wheel from the vehicle, and also remove the tire from the wheel. There are three (3) options to remove the old worn finish from your wheels, including Chemical, Mechanical, and Media Blasting.
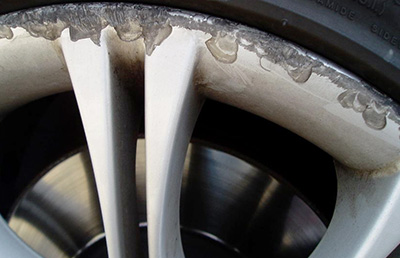
Step 1 – Remove old Finish from Wheel (3 Options)
A). Removing Finish Chemically with Paint Remover
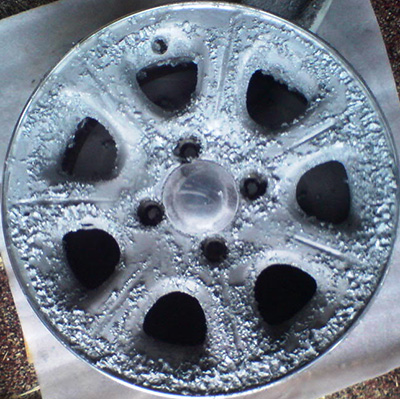
- Chemically removing the old coating uses a Paint Remover to soften and remove the existing finish (pictured right). This works only with previously painted surfaces, and not with chrome plated wheels.
- You can apply Paint Remover to the surface by spraying with an aerosol or brushing on with a Brush.
- Apply thick coats.
- Once applied, allow the Paint Remover to rest on the surface (1 + Hours) and start dissolving the old finish.
- You will then need to scrape the old surface off with a Plastic Putty Knife.
- It is likely that you will need to repeat this process more than once to remove the old finish.
- Whatever is not easily removed can be sanded off with course grit sandpaper.
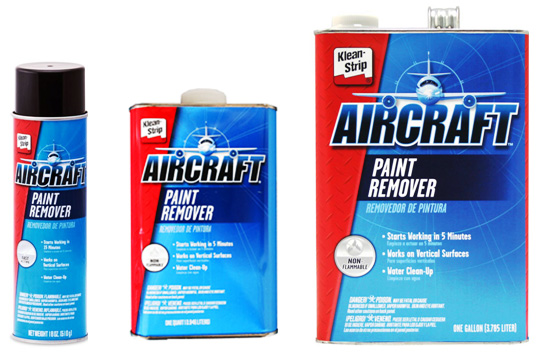
Paint Remover / Stripper Aerosol – Quart – Gallon
B). Removing Finish Mechanically with a Sander
- Mechanically removing the existing finish requires sanding the wheel.
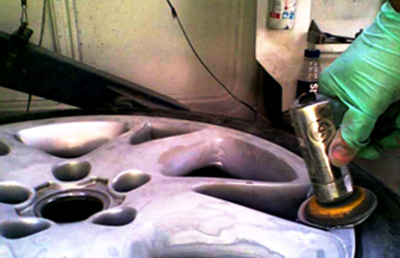
- Use either an air supplied 3 Inch DA Sander (pictured right) or an electric Drill with a 3 Inch Sandpaper Attachment.
- Use a 3 Inch 80 Grit Sandpaper Disc to sand and remove the existing finish down to bare metal. You may have to sand some areas by hand where the sander cannot reach.
- Once the existing finish has been removed sand the surface with a 3 Inch 150 Grit Sandpaper Disc to smooth out and remove the 3 Inch 80 Grit Sandpaper Disc sanding scratches.
C). Removing Finish by Media Blasting
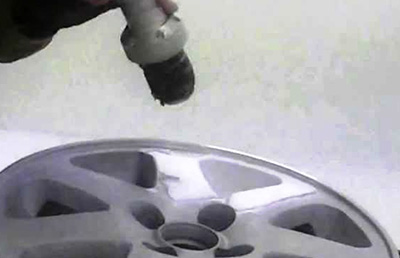
- Removing the existing finish by media blasting usually requires bringing your wheels to a 3rd Party that has the necessary equipment.
- This is probably the easiest, fastest and most effective method for removing the old finish on the wheels.
Step 2 – Clean Wheels
- After wheels have been stripped down completely to bare metal, clean with a hose or pressure washer to remove any remaining sanding dust or debris.
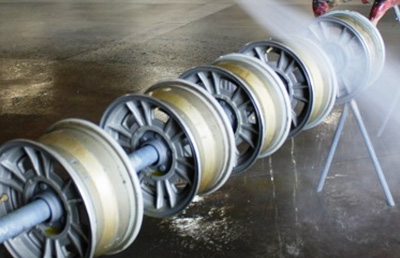
Step 3 – Apply Primer and Sand
- Once wheels are completely dry, wipe or spray Wax and Grease Remover on surface to remove any remaining contaminants. Wipe dry with a clean cloth.
- Apply 1 to 2 light to medium coats of Etch Primer over the bare metal before applying Primer to promote adhesion and provide corrosion resistance.
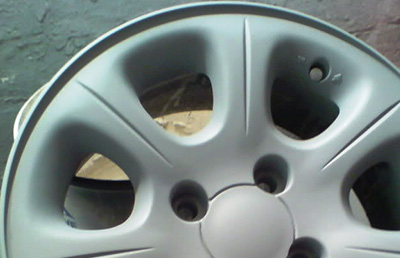
- After Etch Primer has completely dried (approximately 30 minutes @ 70° F), apply 2 to 3 coats of Primer over the wheel allowing each coat to flash off before applying the next.
- Once dry, finish sand the entire wheel with 800 Grit Production Sandpaper. Make sure all areas that have been primed are sanded. You can use a Gray Scuff Pad to reach area that may be difficult to reach with sandpaper.
Helpful Tip: There are a number of methods to apply Primer including Spray Gun, Preval Sprayer, Spra Tool or Aerosol. The Spray Gun requires an air compressor. The Preval Sprayer and Spra Tool require the purchase of a pint or quart of coating that can then be added to the spray container. Using an Aerosol is very convenient – nothing to mix or add.
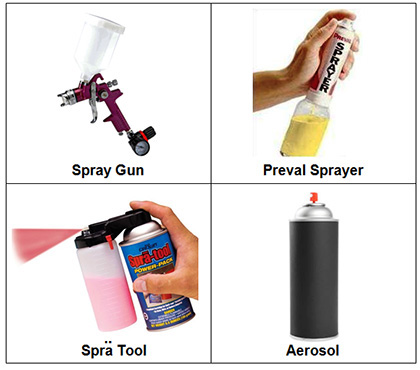
Application Methods
Step 4 – Choose your Wheel Color (click on the Color Chart link below)
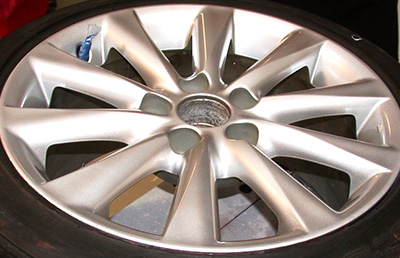
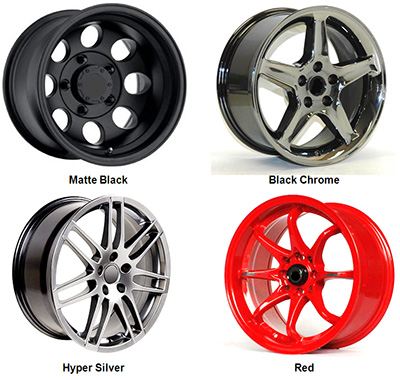
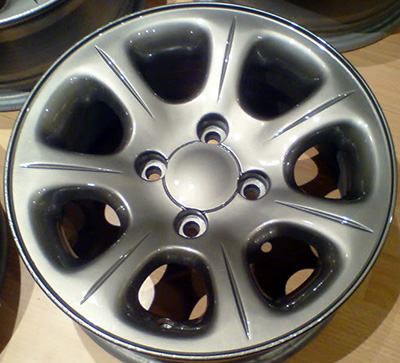
- You can choose a color from the Wheel Color Chart that matches the OEM Color, or you can choose a Custom Color (examples pictured below). If you want to paint your wheels By using the OEM Color Selector you can choose a color to match your vehicle color.
Step 5 – Apply Color and Clear
- Apply 2 to 3 medium wet coats of Color to the wheel, allowing each coat to flash off before applying the next.
- If using a Base Color, you will have to apply Clear once the Base Color has dried.
- Apply 2 to 3 medium wet coats of Clear, allowing each coat to flash off before applying the next.
- Allow Color and/or Clear to dry 24 hours before handling.
Helpful Tip: There are a number of methods to apply Color and Clear including Spray Gun, Preval Sprayer, Spra Tool or Aerosol (see application methods below).
Application Methods
Wheel Protection and Appearance Enhancement
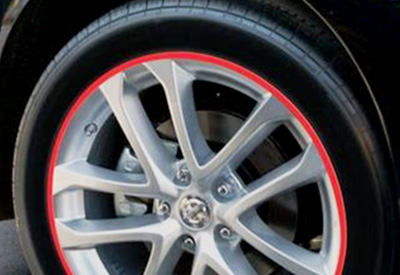
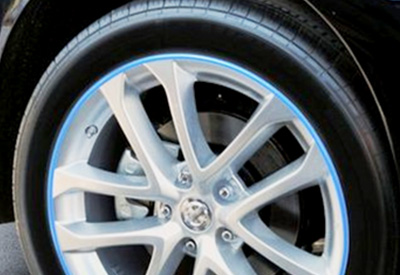
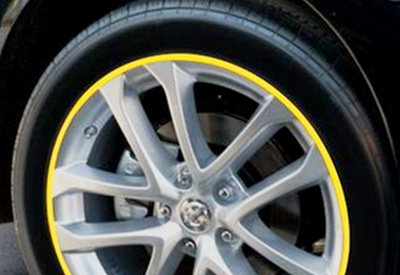
If you want to protect and enhance the look of your new or refinished wheels try these easy to install ¼ Inch moldings that come in Red, Blue, Yellow and Black. You simply cut the molding to fit the length of your wheel, pull back the adhesive, and attach the molding to the edge of the wheel / rim.
- 1/4 Inch wide, 20 Feet Long Molding Kit.
- Colors: Red, Blue, Yellow and Black.
- For use on Cars, Trucks and SUVs.
- Flexibility and durable material makes it easy to maneuver on curved surfaces.
- Cuts easily for a do it yourself easy application.
- 3M Automotive Attachment Tapes ensures that it stays on.
An inexpensive way to protect and customize your wheels.
Please be Advised
The recommendations and process steps listed in the projects below are general do-it-yourself recommendations that are designed to produce a successful project. Due to the many variables involved with each project and process steps, Touch Up Zone cannot guarantee results and does not accept liability for incorrect product application or use.
Before you Start
- Always wear proper safety protection: Safety Glasses, Respirator, Particle Mask, Latex or Nitrile Gloves and Hearing Protection (if you are using power tools that emit high noise levels).
- Utilize a well ventilated area when spraying coatings or sanding.
- Make sure the temperature is warm enough to allow coatings and materials to dry properly.
- Work in a well lighted area where you can clearly see what you are doing.
- Always follow label instructions on products.
Tools, Equipment, Paint and Material Options
The Tools, Equipment, Paint and Materials recommended for the each project are listed in the repair procedure and are highlighted in Red. You can purchase the Tools, Equipment, Paint and Materials for these products by clicking on the button below. For product definitions and general tech tips click here.

